
So if you’re here from our DIY kitchen reno post, you’ll know that we got good at surviving without a kitchen.
4 months is a LONG TIME without the normal function of a kitchen.
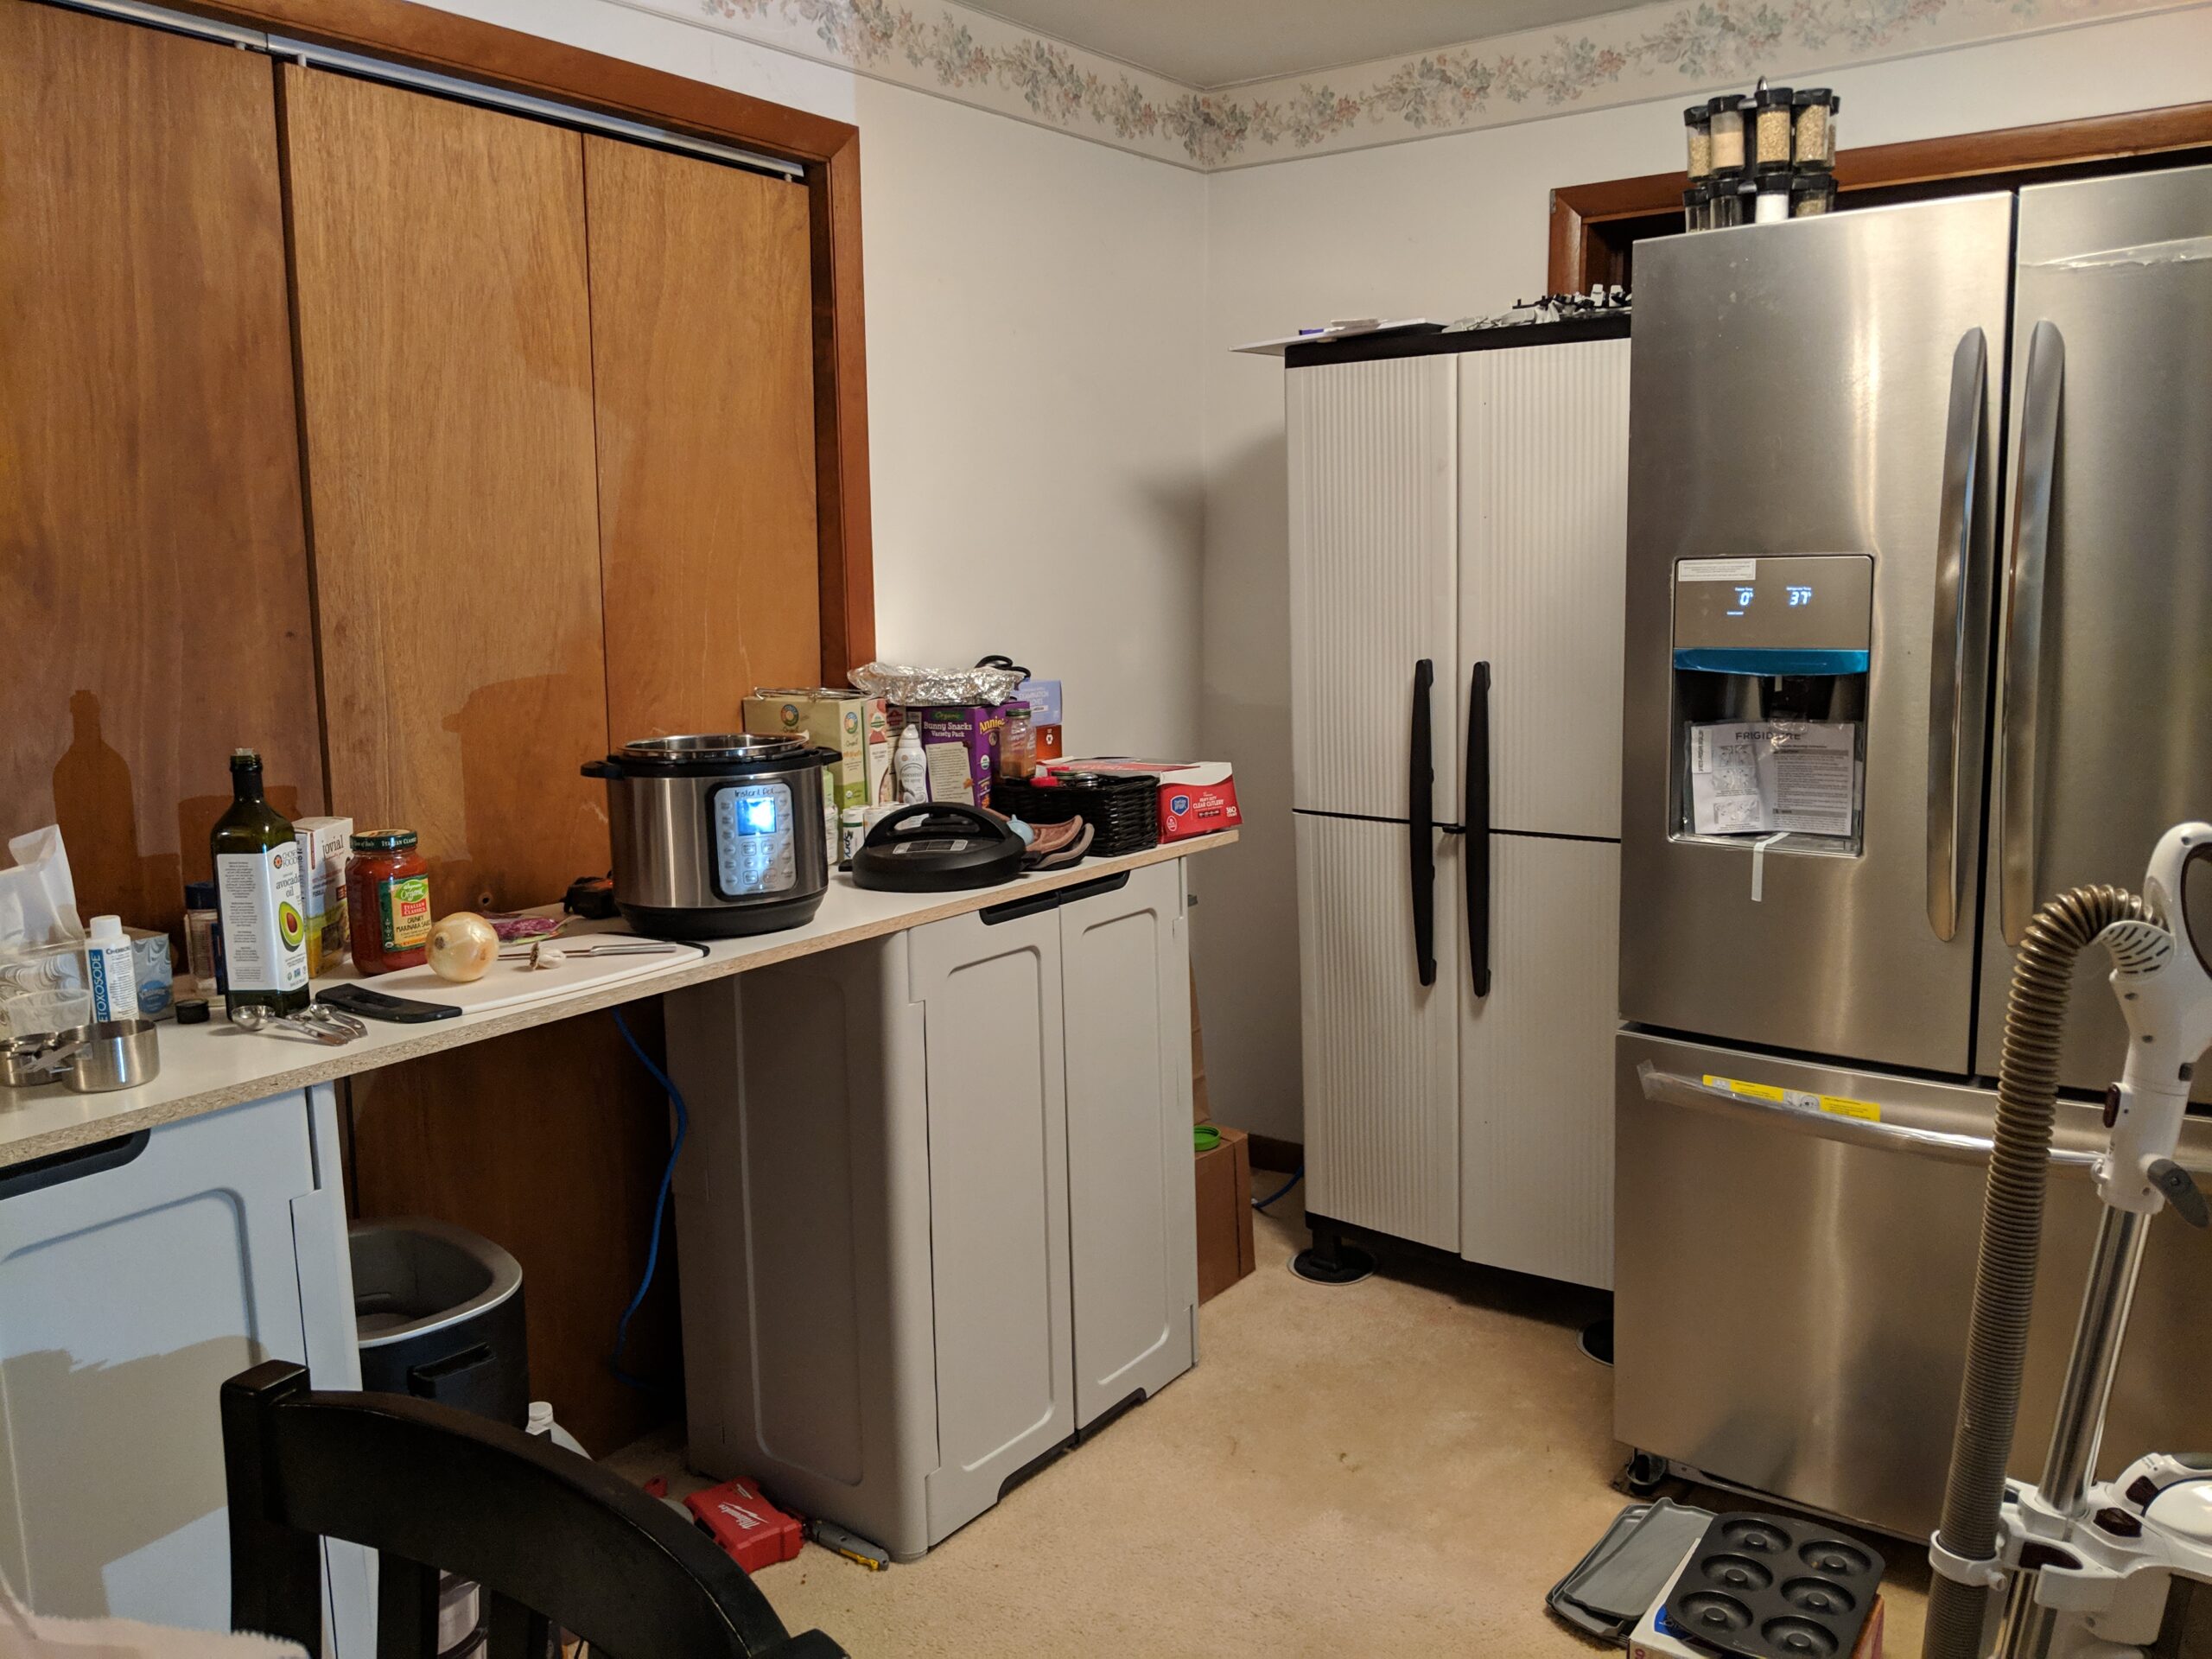
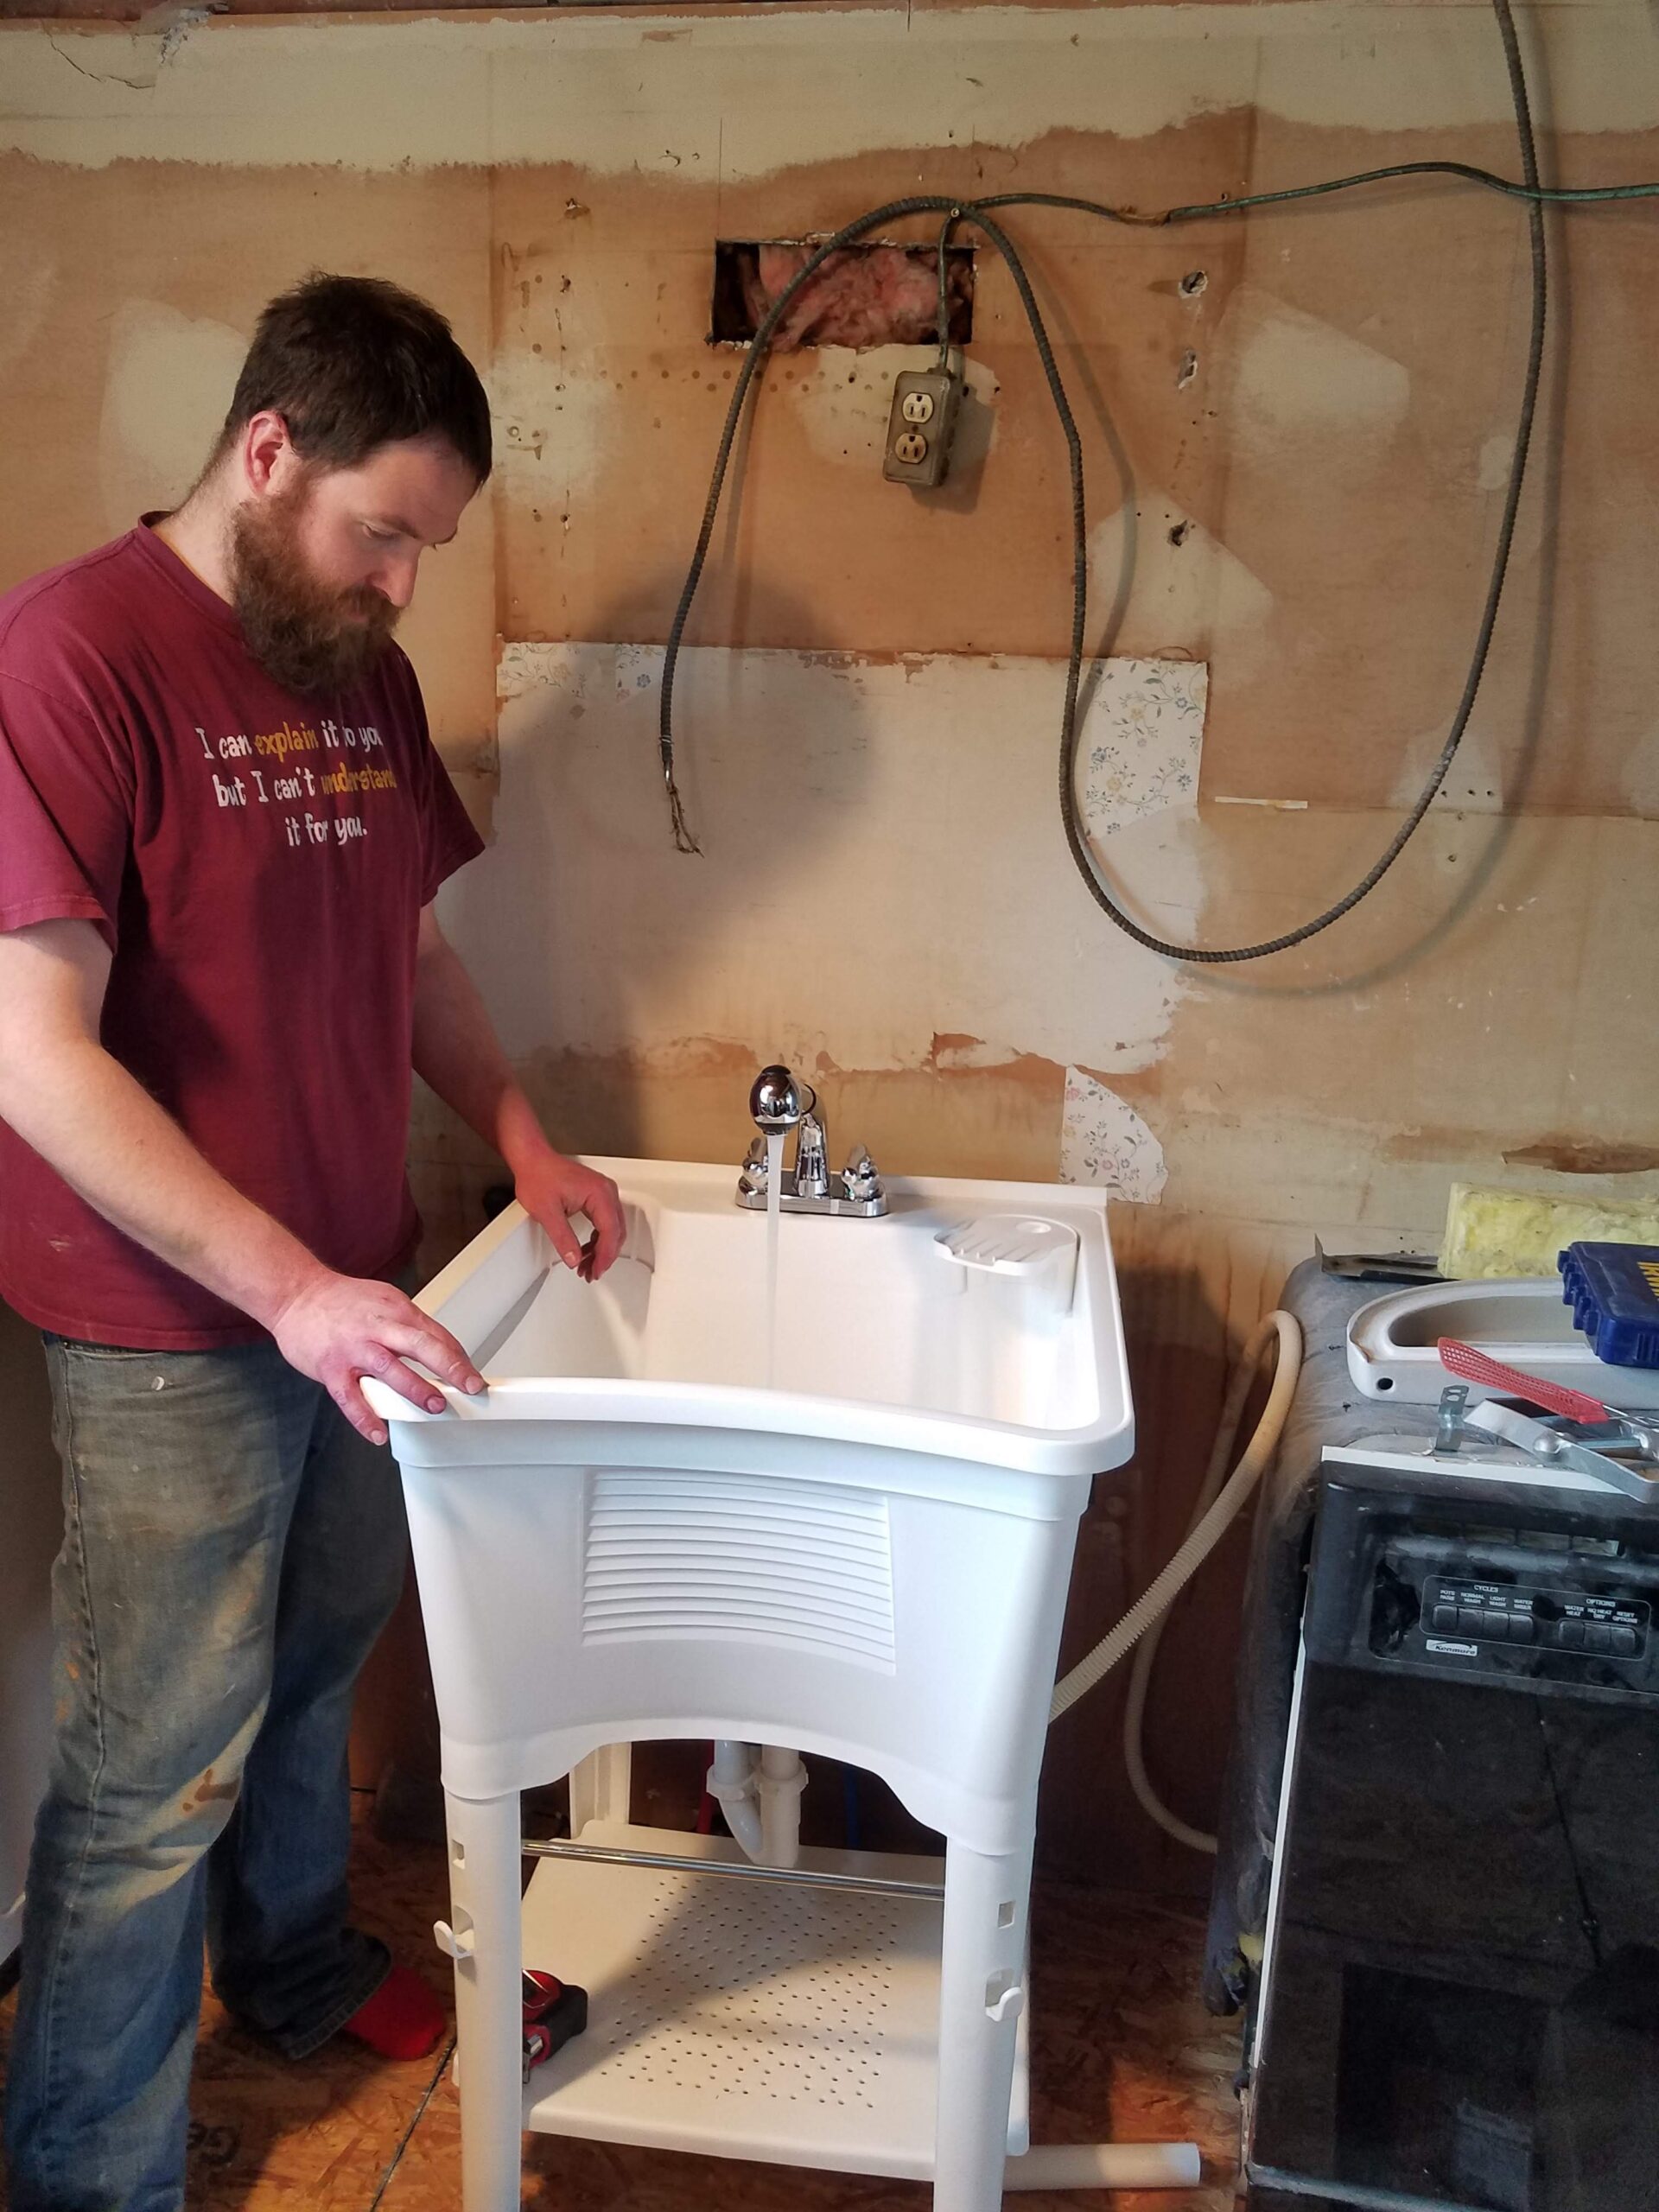
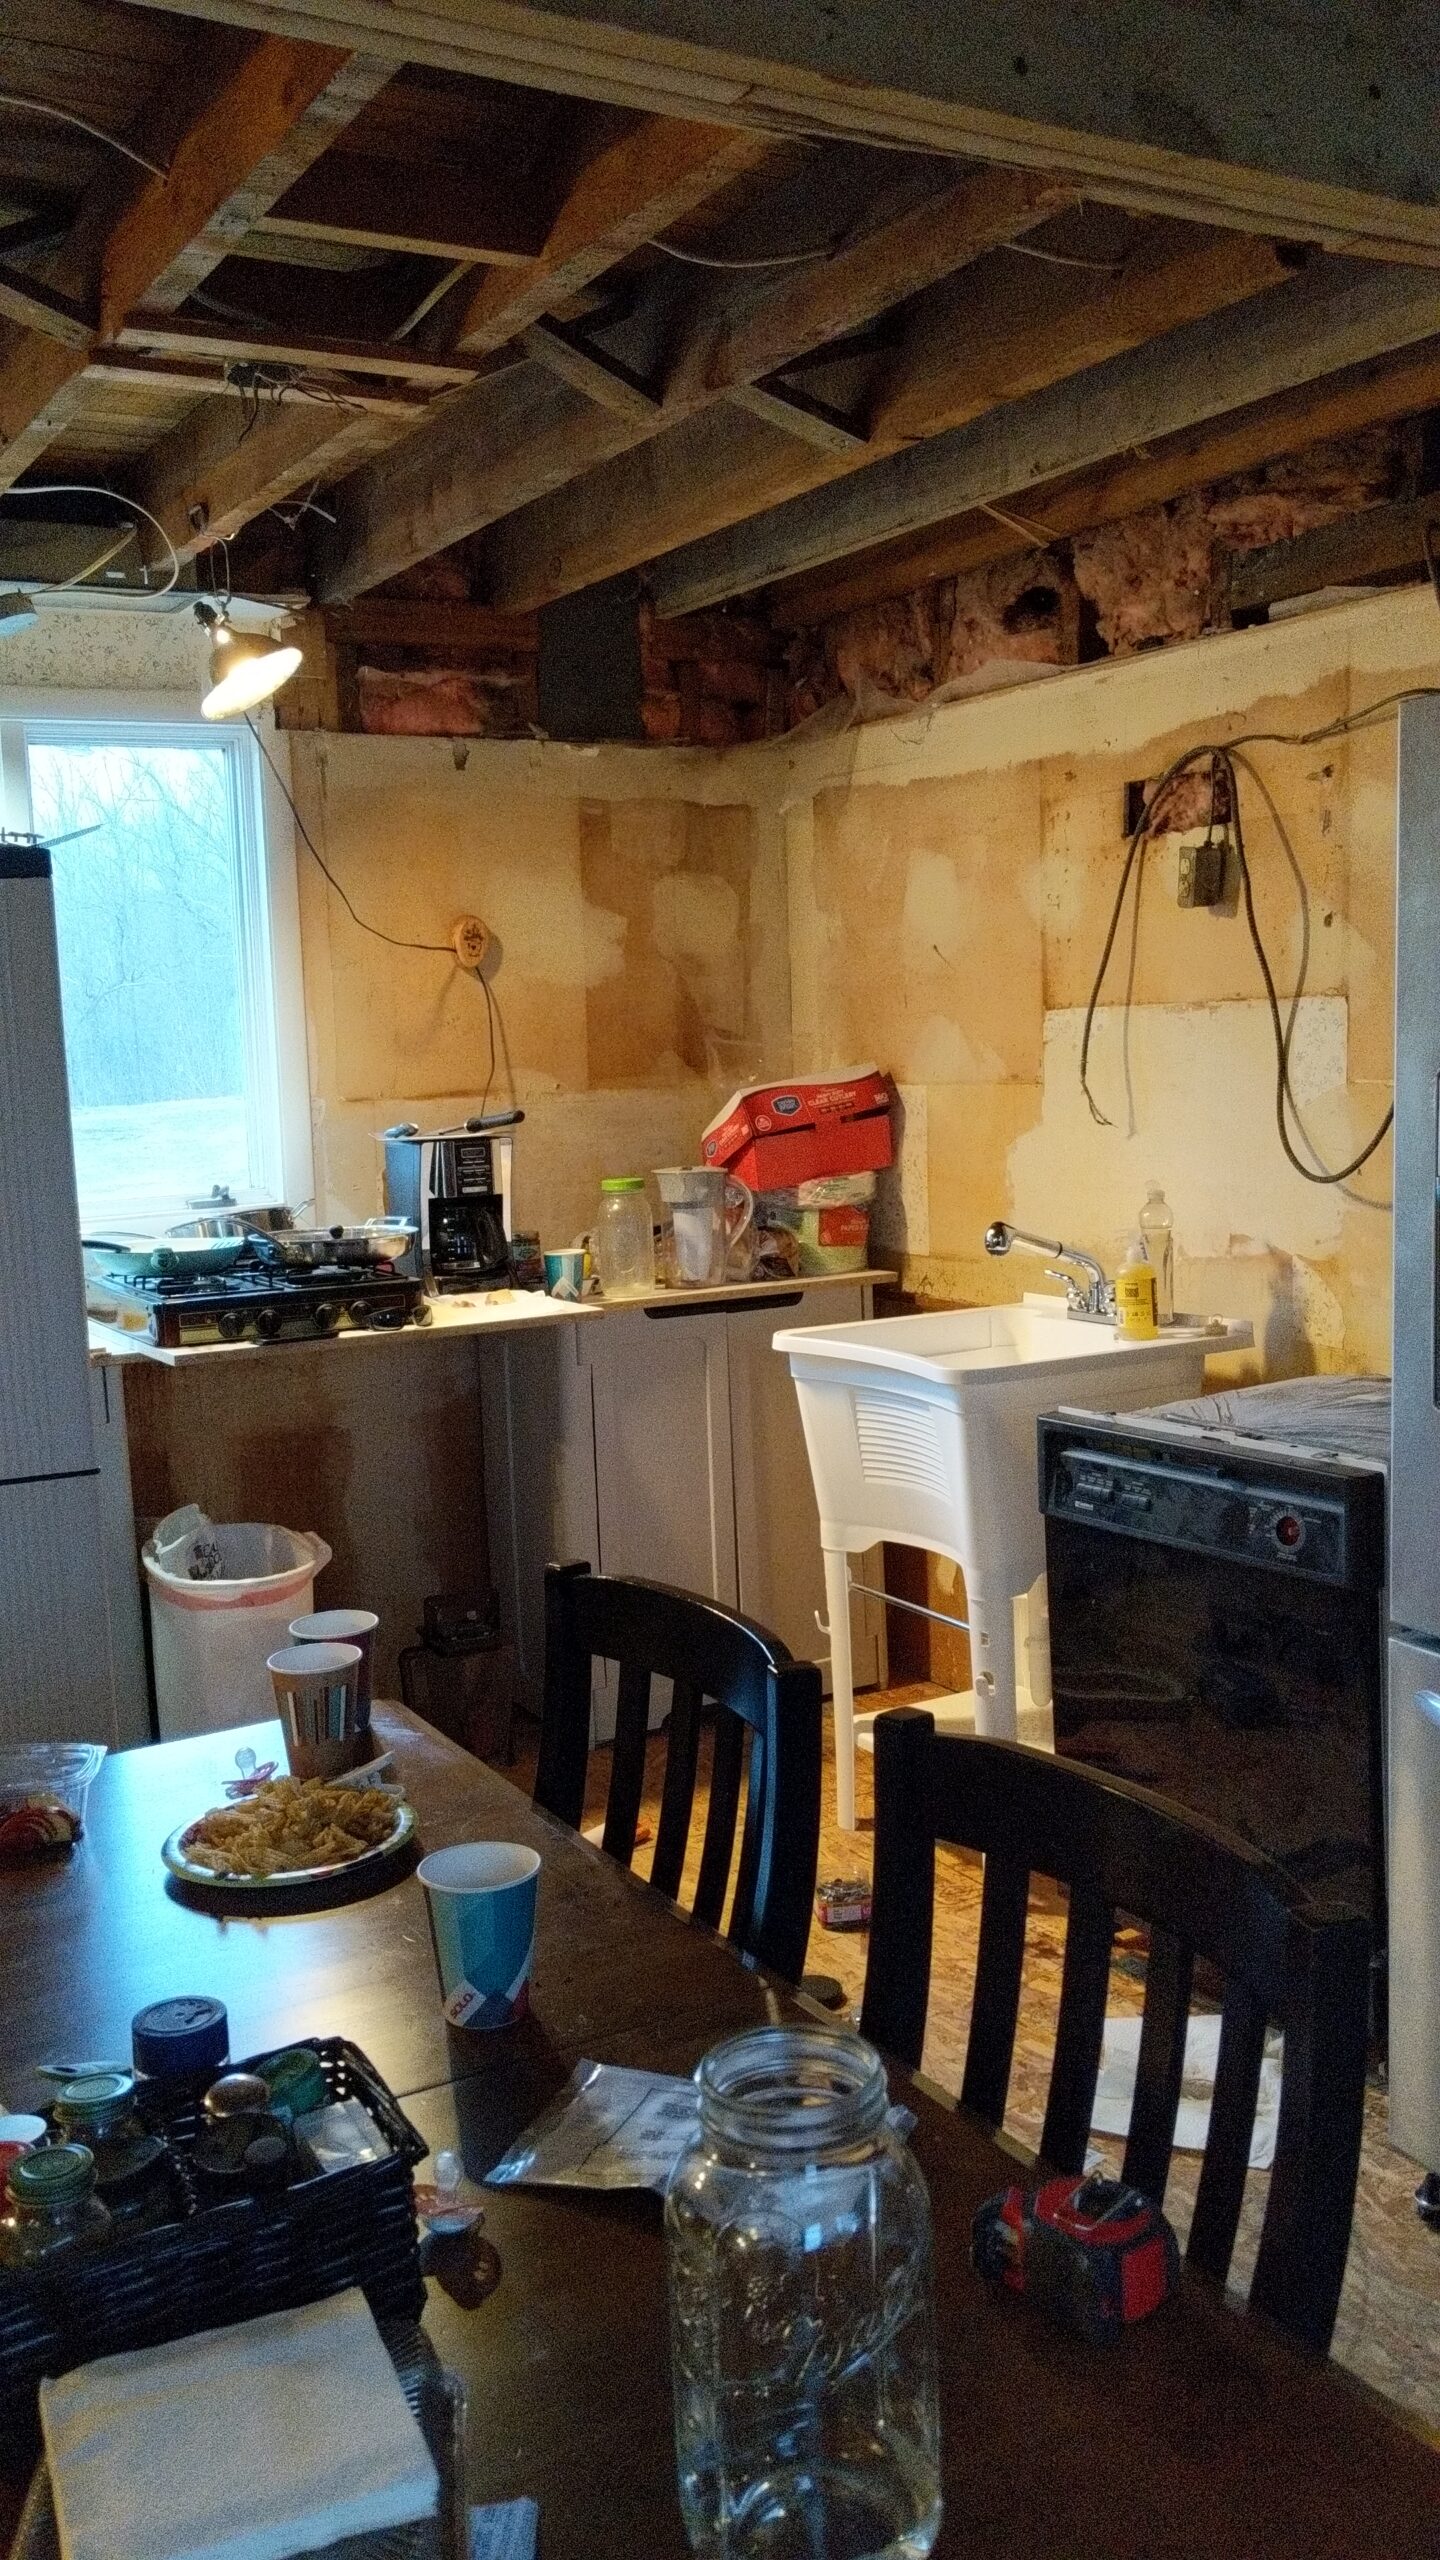
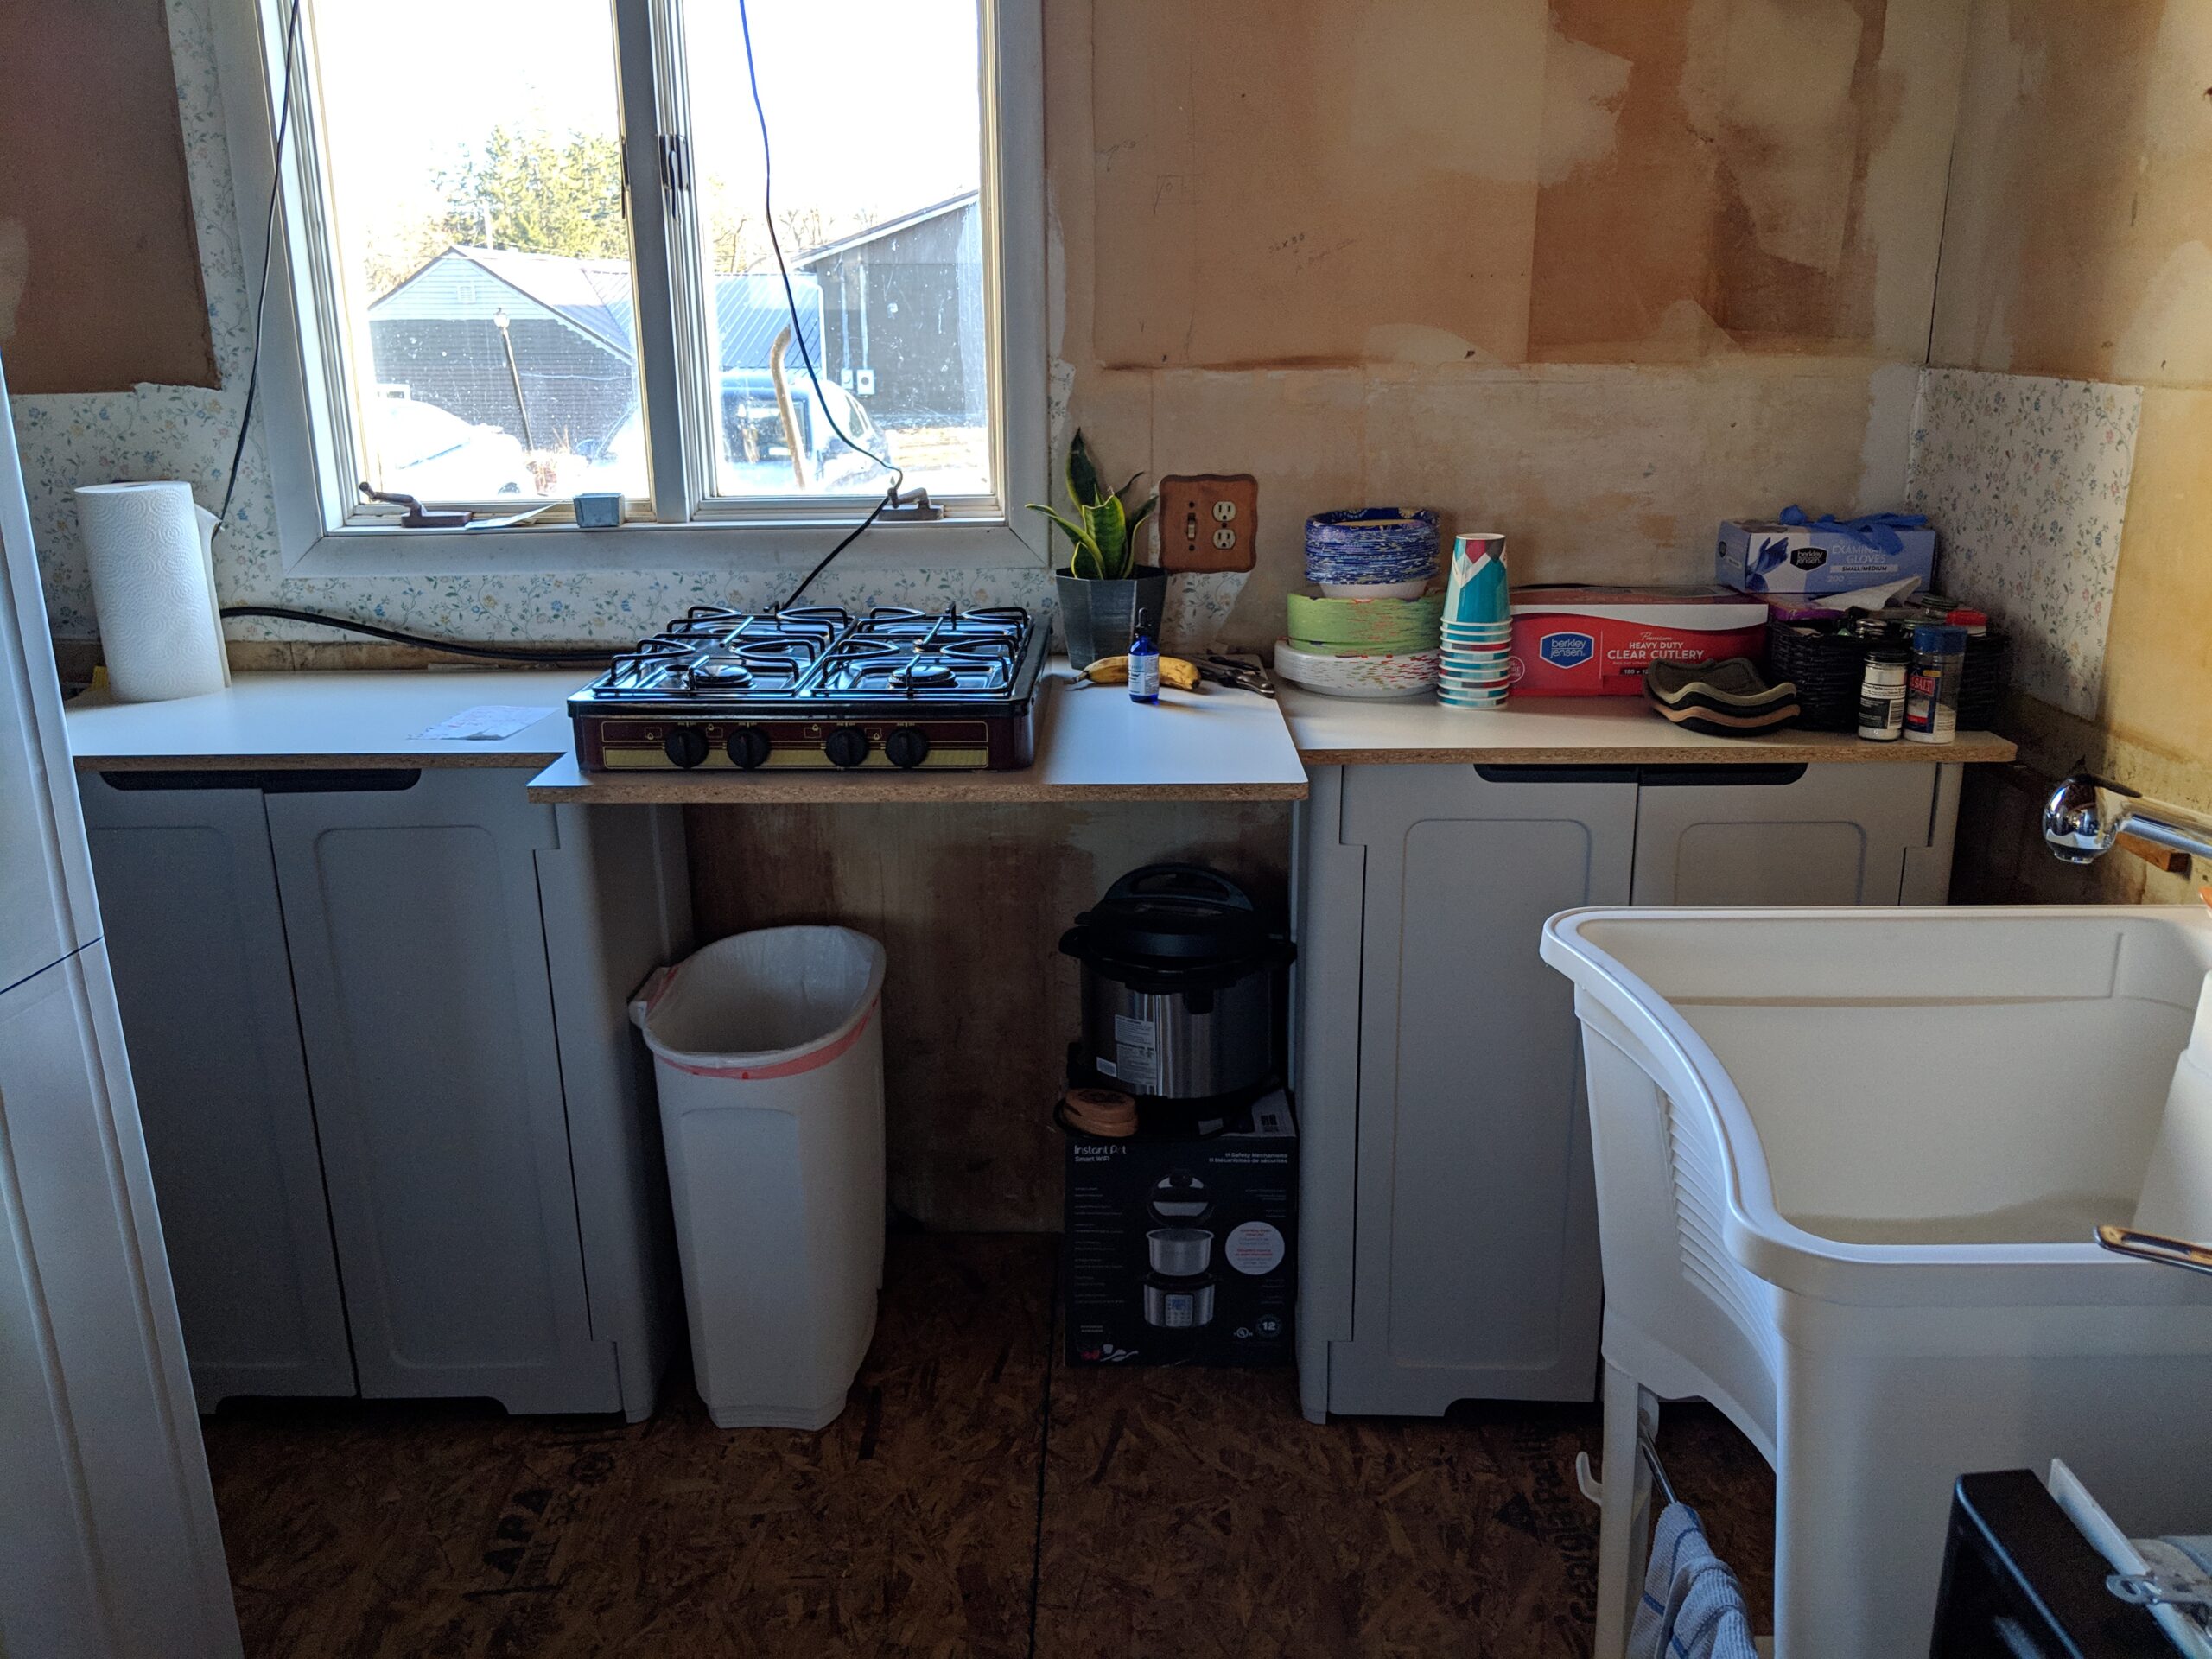
I had the multi-cookers mentioned in our tools page, a camp stove, a couple cheapy garage cabinets, melamine slab for ‘countertop’, a small toaster oven, and finally a cheap laundry tub for a sink.
We didn’t have water downstairs for a good month of the reno, so if I had veggies/fruit to wash, I had to go upstairs and use the ancient pink sink in the bathroom.
Good times.
This (below) was the cheapy garage ‘pantry’ cabinet we bought to keep the food semi-contained.
I can’t IMAGINE being able to put tools, parts, outdoor toys, equipment, paint cans, or anything else that’s supposed to be stored in a garage and weighs anything on those shelves.
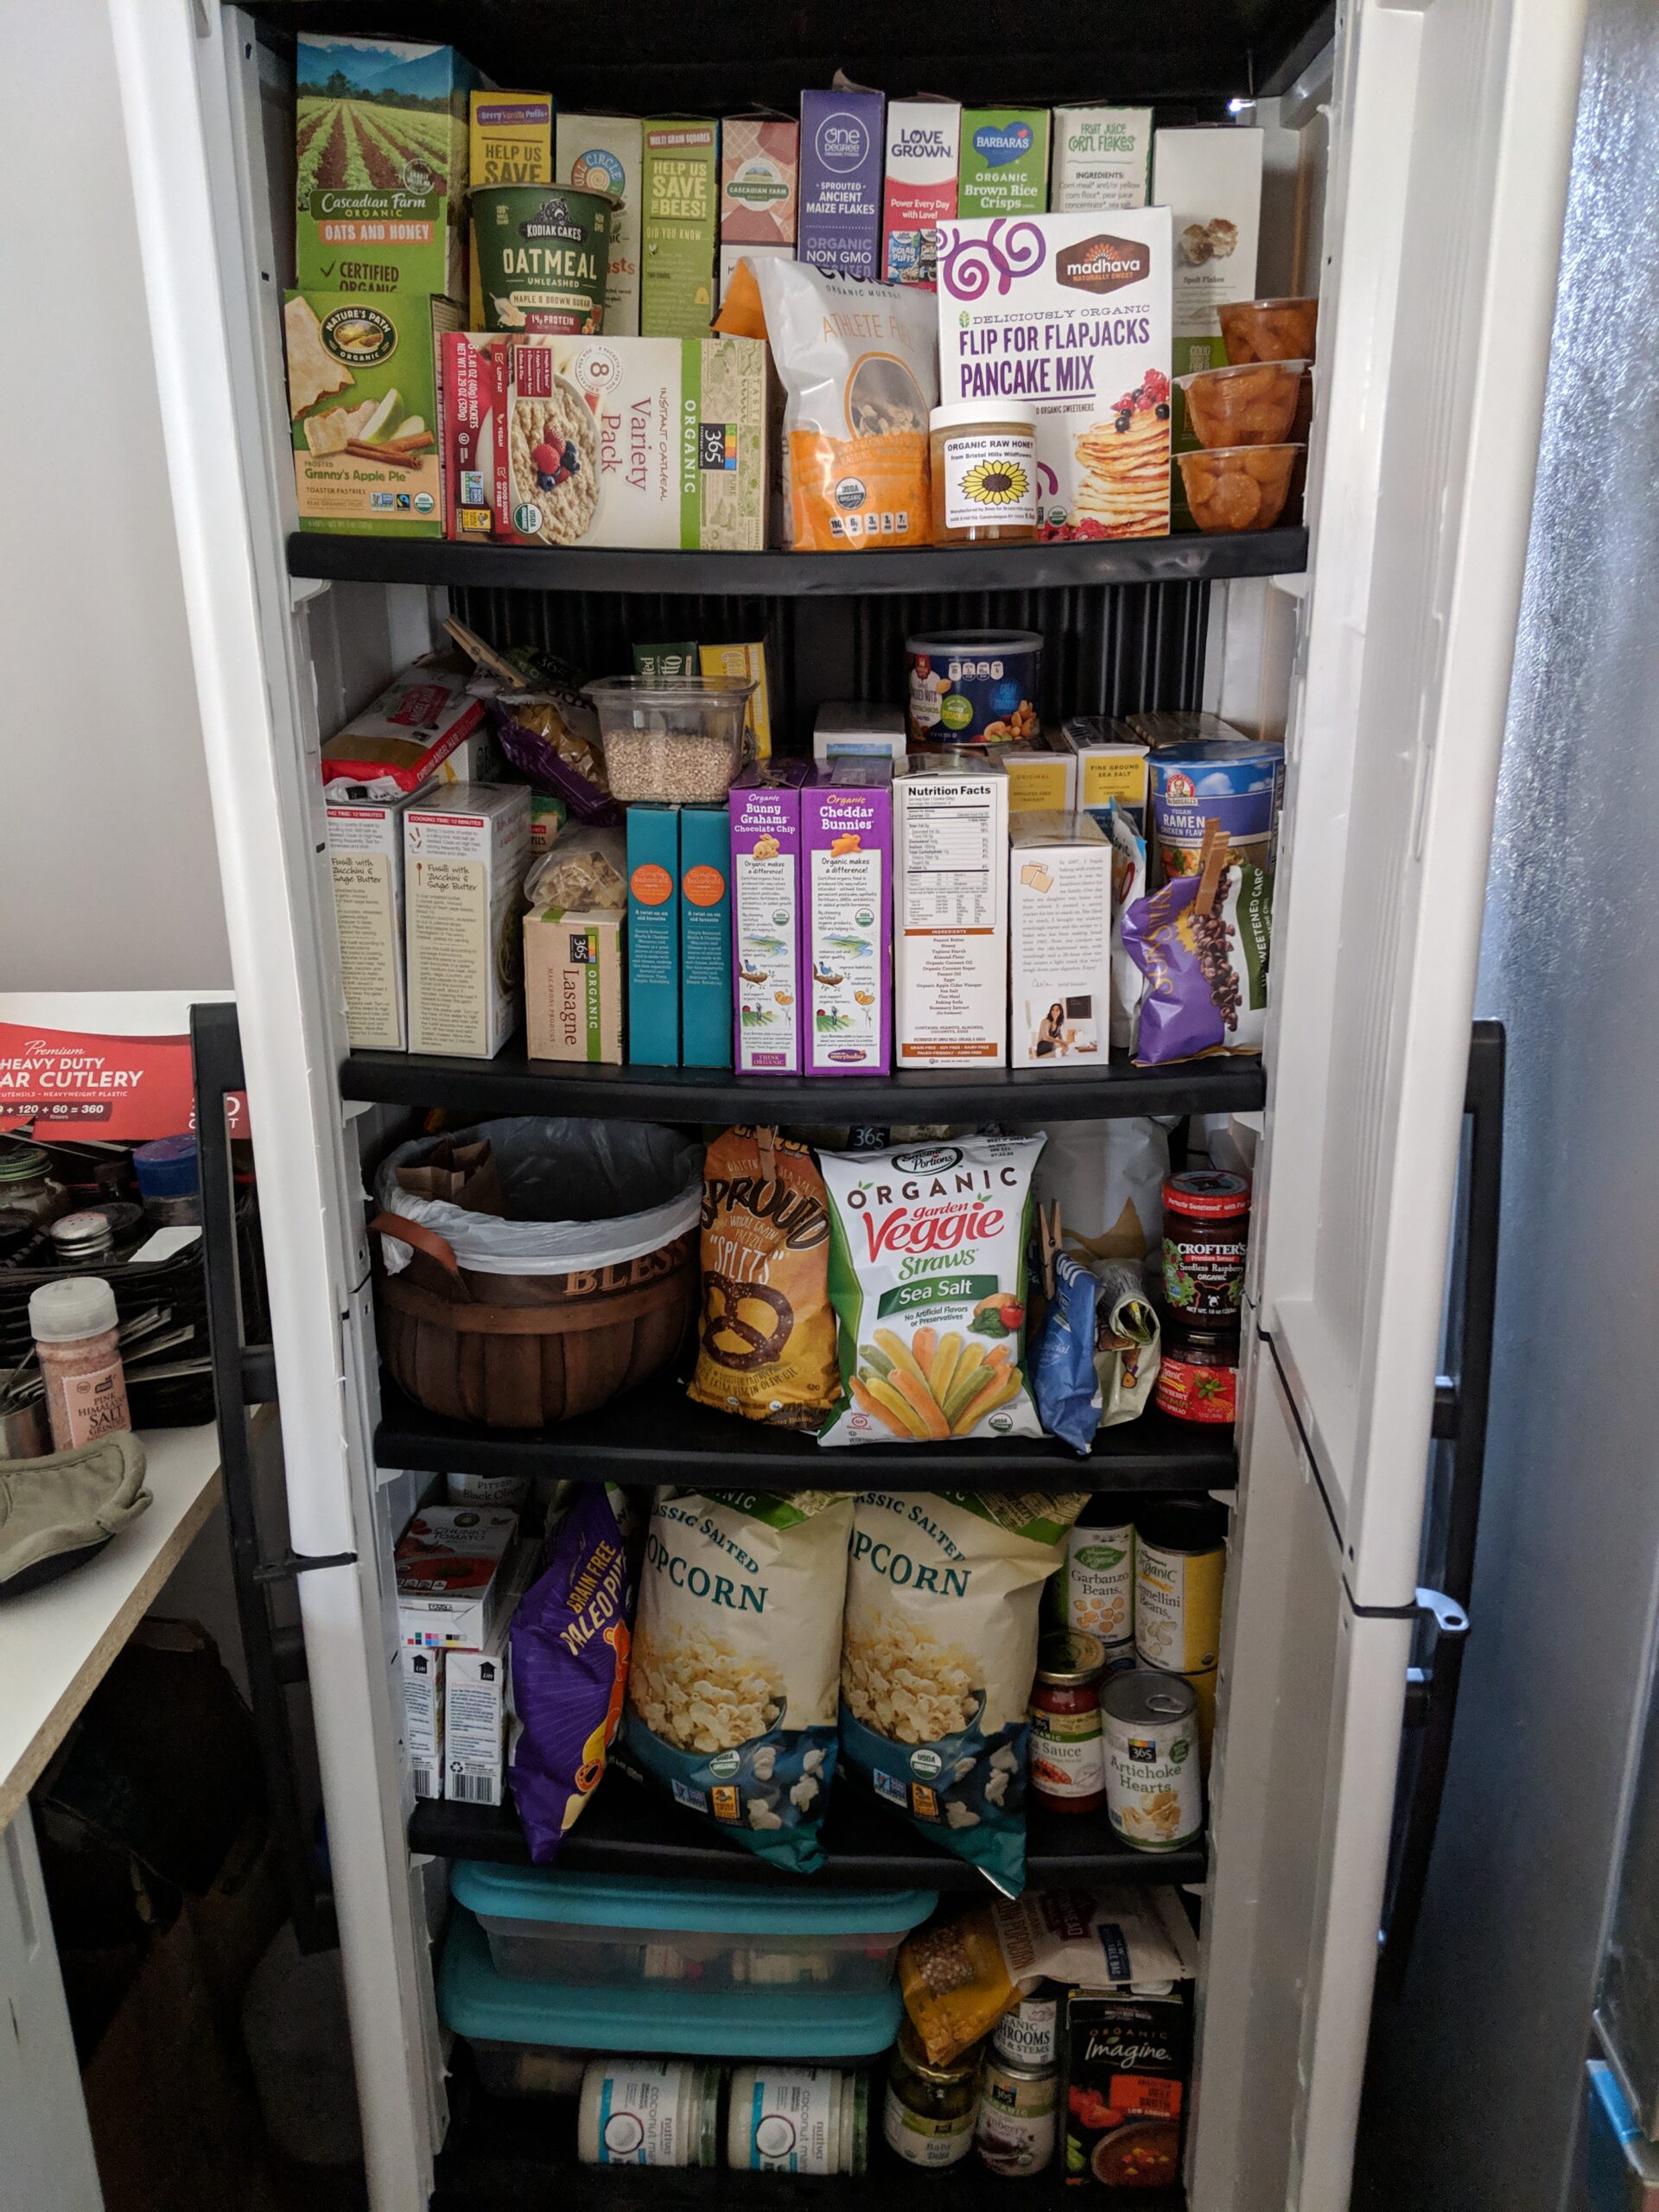
This was the grocery overflow, ha. The floor.

This is where Thrive Market comes in so handy.
When you’re in the middle of surviving without a kitchen, usually there’s 2 choices – starve half to death or take-out every night.
Instead, we bought real food ingredients and improvised with multi-cookers like the instant pot.
For all other meals and snacks we went with easy, prepared options that weren’t full of toxic chemicals and stuff that makes you feel like crap. Thrive has TONS of options.
Food ideas for surviving without a kitchen:
Breakfast
- organic cereal with organic (preferably local & raw) milk
- fruit with organic, unsweetened yogurt (sweetened with maple syrup)
- organic pb & banana or fruit on sourdough toast
Lunch & Snack
- wild caught tuna salad with organic bread or crackers
- organic pb&j on sourdough with Late July organic chips
- organic greens (romaine, baby lettuce, butter head, spring mix) with tuna or organic lunchmeat
- apple with PB and Chomps meat stick
- Late July tortilla chips with (organic) salsa and cheese
- Chomps meat stick with bag of Annie’s organic cheddar bunnies or graham crackers
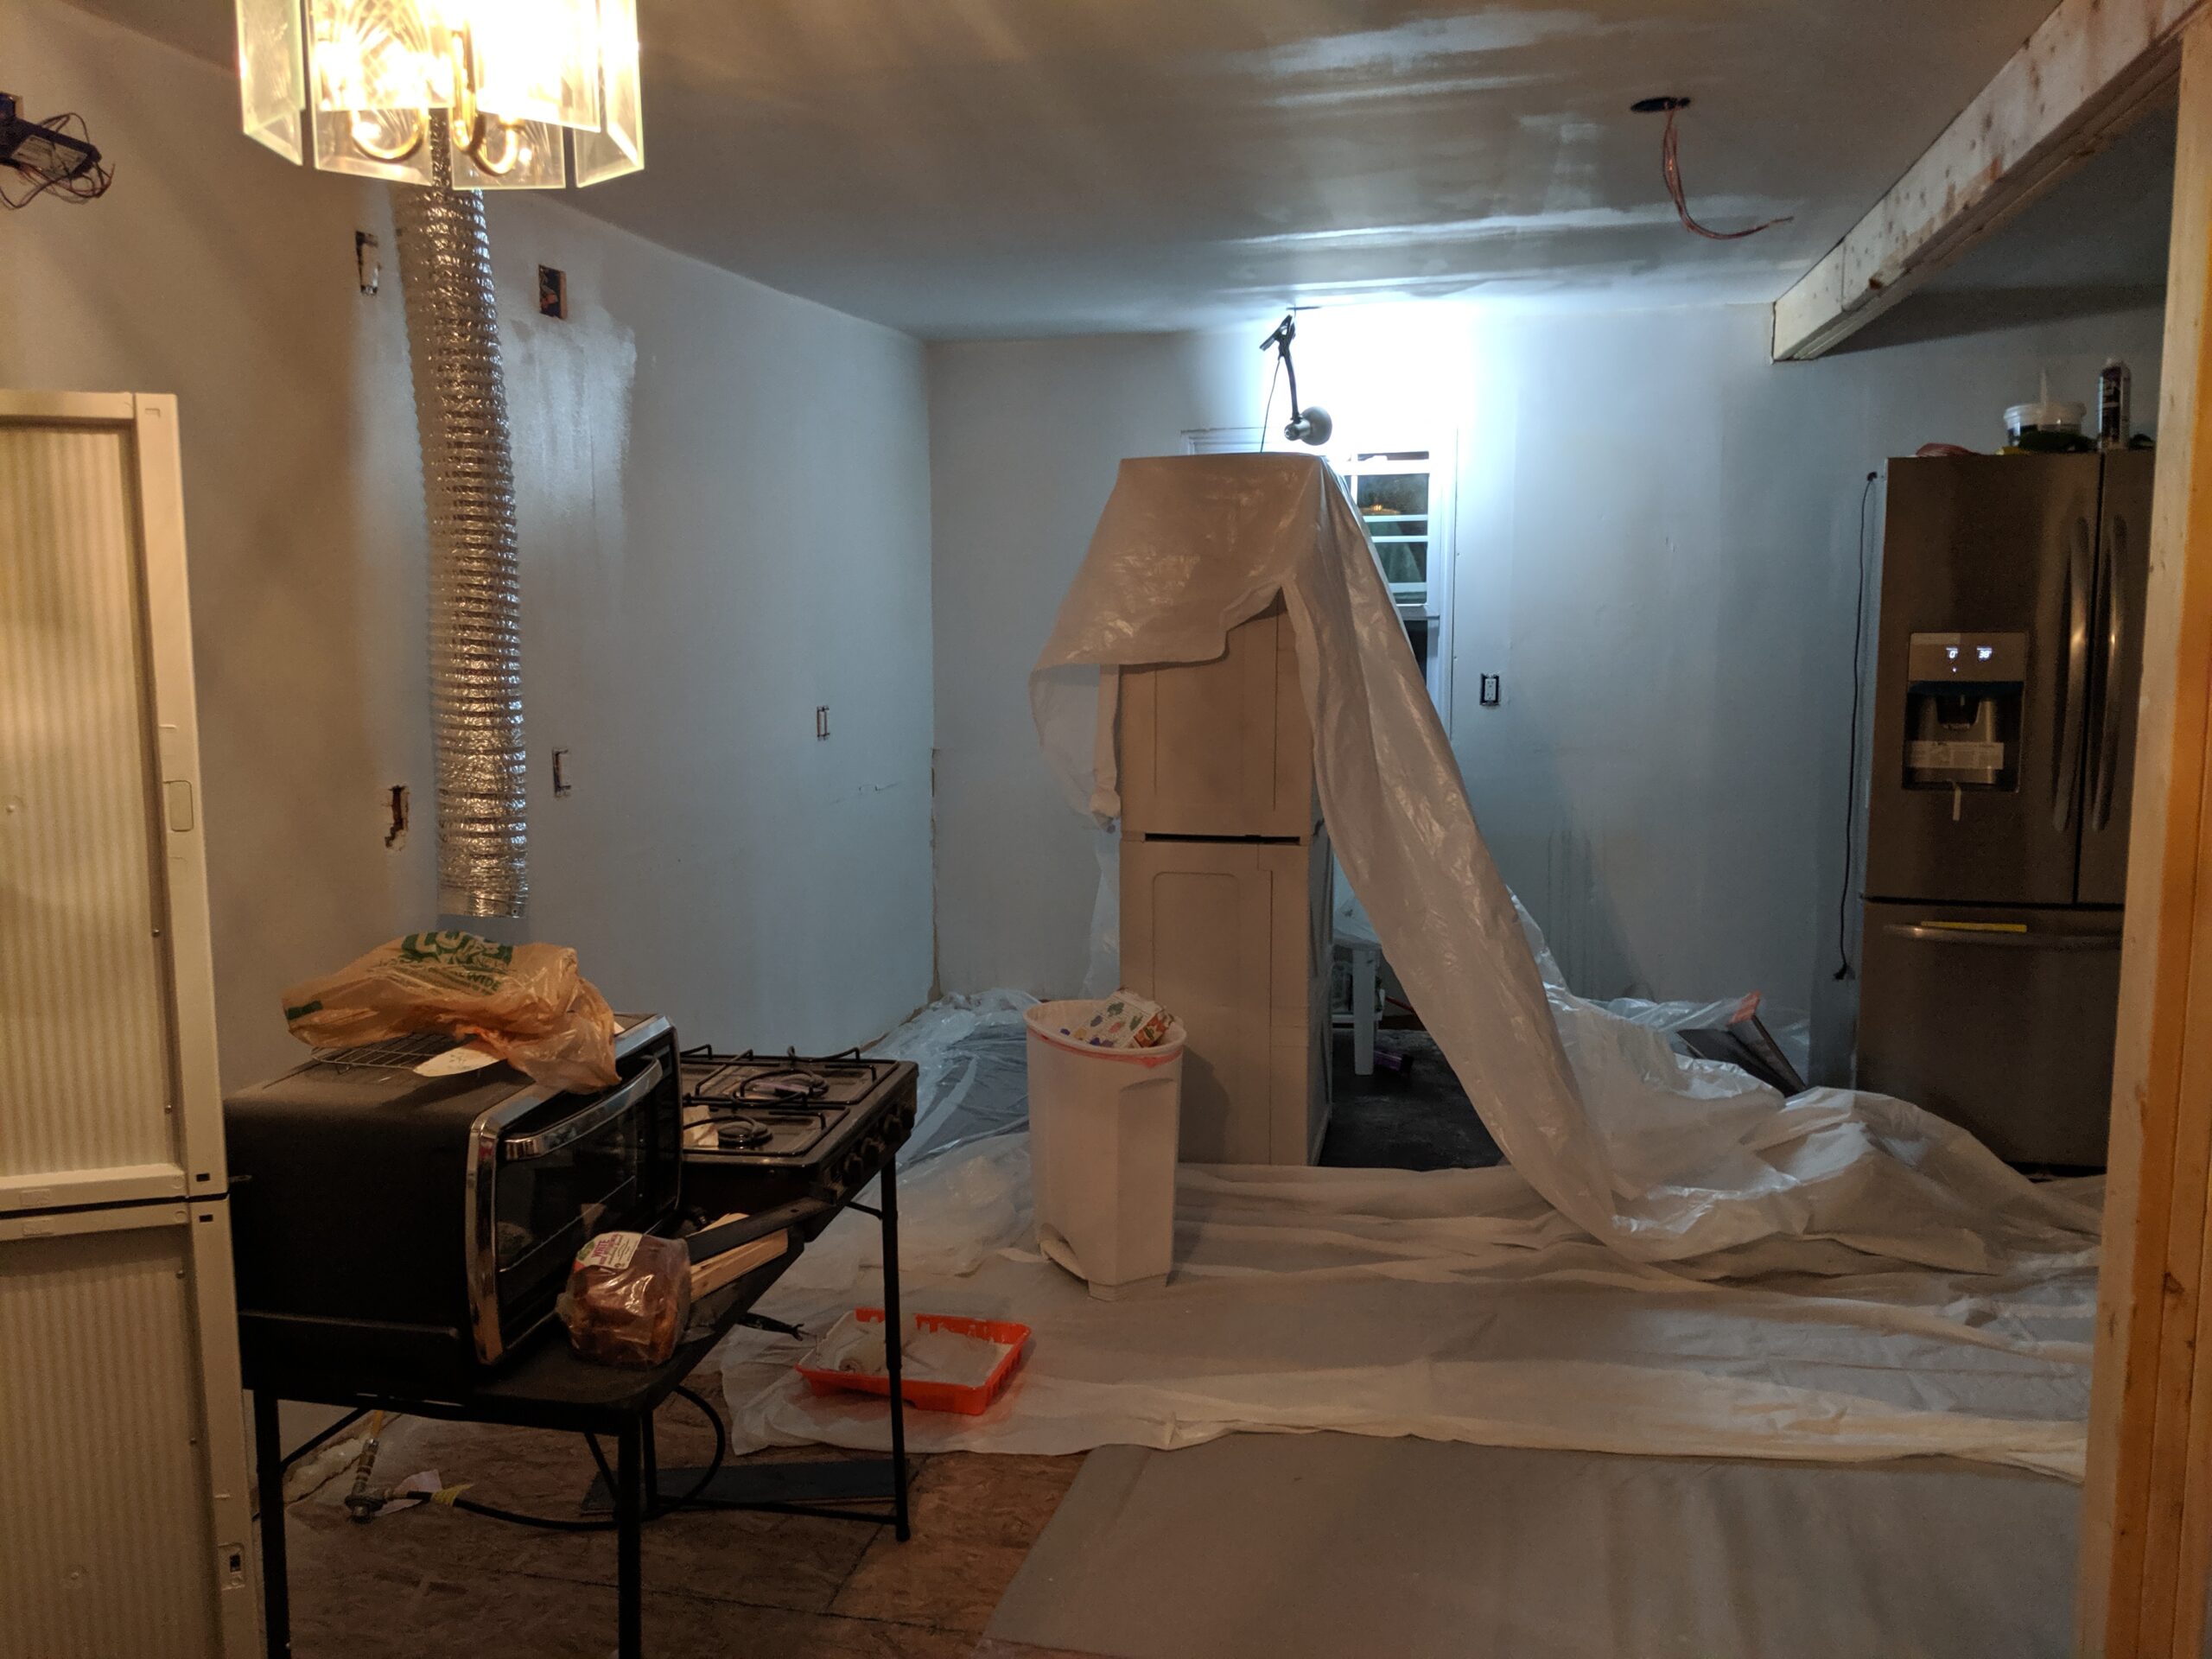
At first I only had the multi-cookers, then we ‘expanded’ to the 4 burner camp stove and toaster oven. I even made COOKIES in that toaster oven. Like 3 at a time. HA.
Eventually, after about a month of going upstairs to use the ancient pink bathroom sink to wash veggies and clean up, Ryan finished the plumbing for the new sink and dishwasher and hooked up a laundry tub so we had water again downstairs.
The dishwasher that came with the house was broken, but functional (if you used a wrench to start it), so we hooked that up for the meantime too. I still had very limited space to put any drying clean dishes or pots and pans.
Tips to help YOU survive without a kitchen
#1 Buy gloves
Seriously – wearing plastic gloves to cut veggies, work with meat, clean up, etc., was a lifesaver for me when we only had one functional sink and it was in the farthest part of the house from where the temp kitchen was set up. Sure if you want the extra exercise, aim to do the run up and down all the time. I’d still have some on hand for when you don’t have the time for a spontaneous jog.
#2 Don’t feel bad about the snacks
Yeah, organic cookies and crackers aren’t the best meal, but they’re better than takeout, pizza, and fast food every night. You’re in a HARD spot right now, do the best you can, and then let it go. Know that when your kitchen is back, you’ll make lots of healthy meals and snacks for your family and you’ll appreciate it even more.
#3 Buy healthy ‘fast-food’ options
This goes with #2, but it’s important enough to have it’s own spot.
If you have a decent grocery store in your area (we have Wegmans), they should have options like:
- refrigerated organic pizza dough
- organic pizza sauce
- fresh & organic cheeses
- natural pepperoni
- Lindsay brand olives
- pre-sliced or whole mushrooms, etc
- grass fed burgers
- organic buns & toppings: organic lettuce, onions, primal kitchen ketchup, mustard, organic brands of mayo
- frozen (organic, you get the idea) fries
- organic rotisserie chicken
- throw some sweet potatoes/white potatoes in a crockpot for a couple hours or instant pot for a few minutes
- add a can of organic green beans/veggies of your choice
- warm organic frozen rolls in toaster oven
- organic frozen pizzas (make sure they fit in your toaster oven!)
- organic chicken fingers with:
- boxes of organic mac n’ cheese
- frozen or canned organic veggie
Are they ideal? No, but like #2, they are many times better than take out or fast food every night. Unless, of course, you live near an organic restaurant, in which case the above options will still be a lot cheaper.
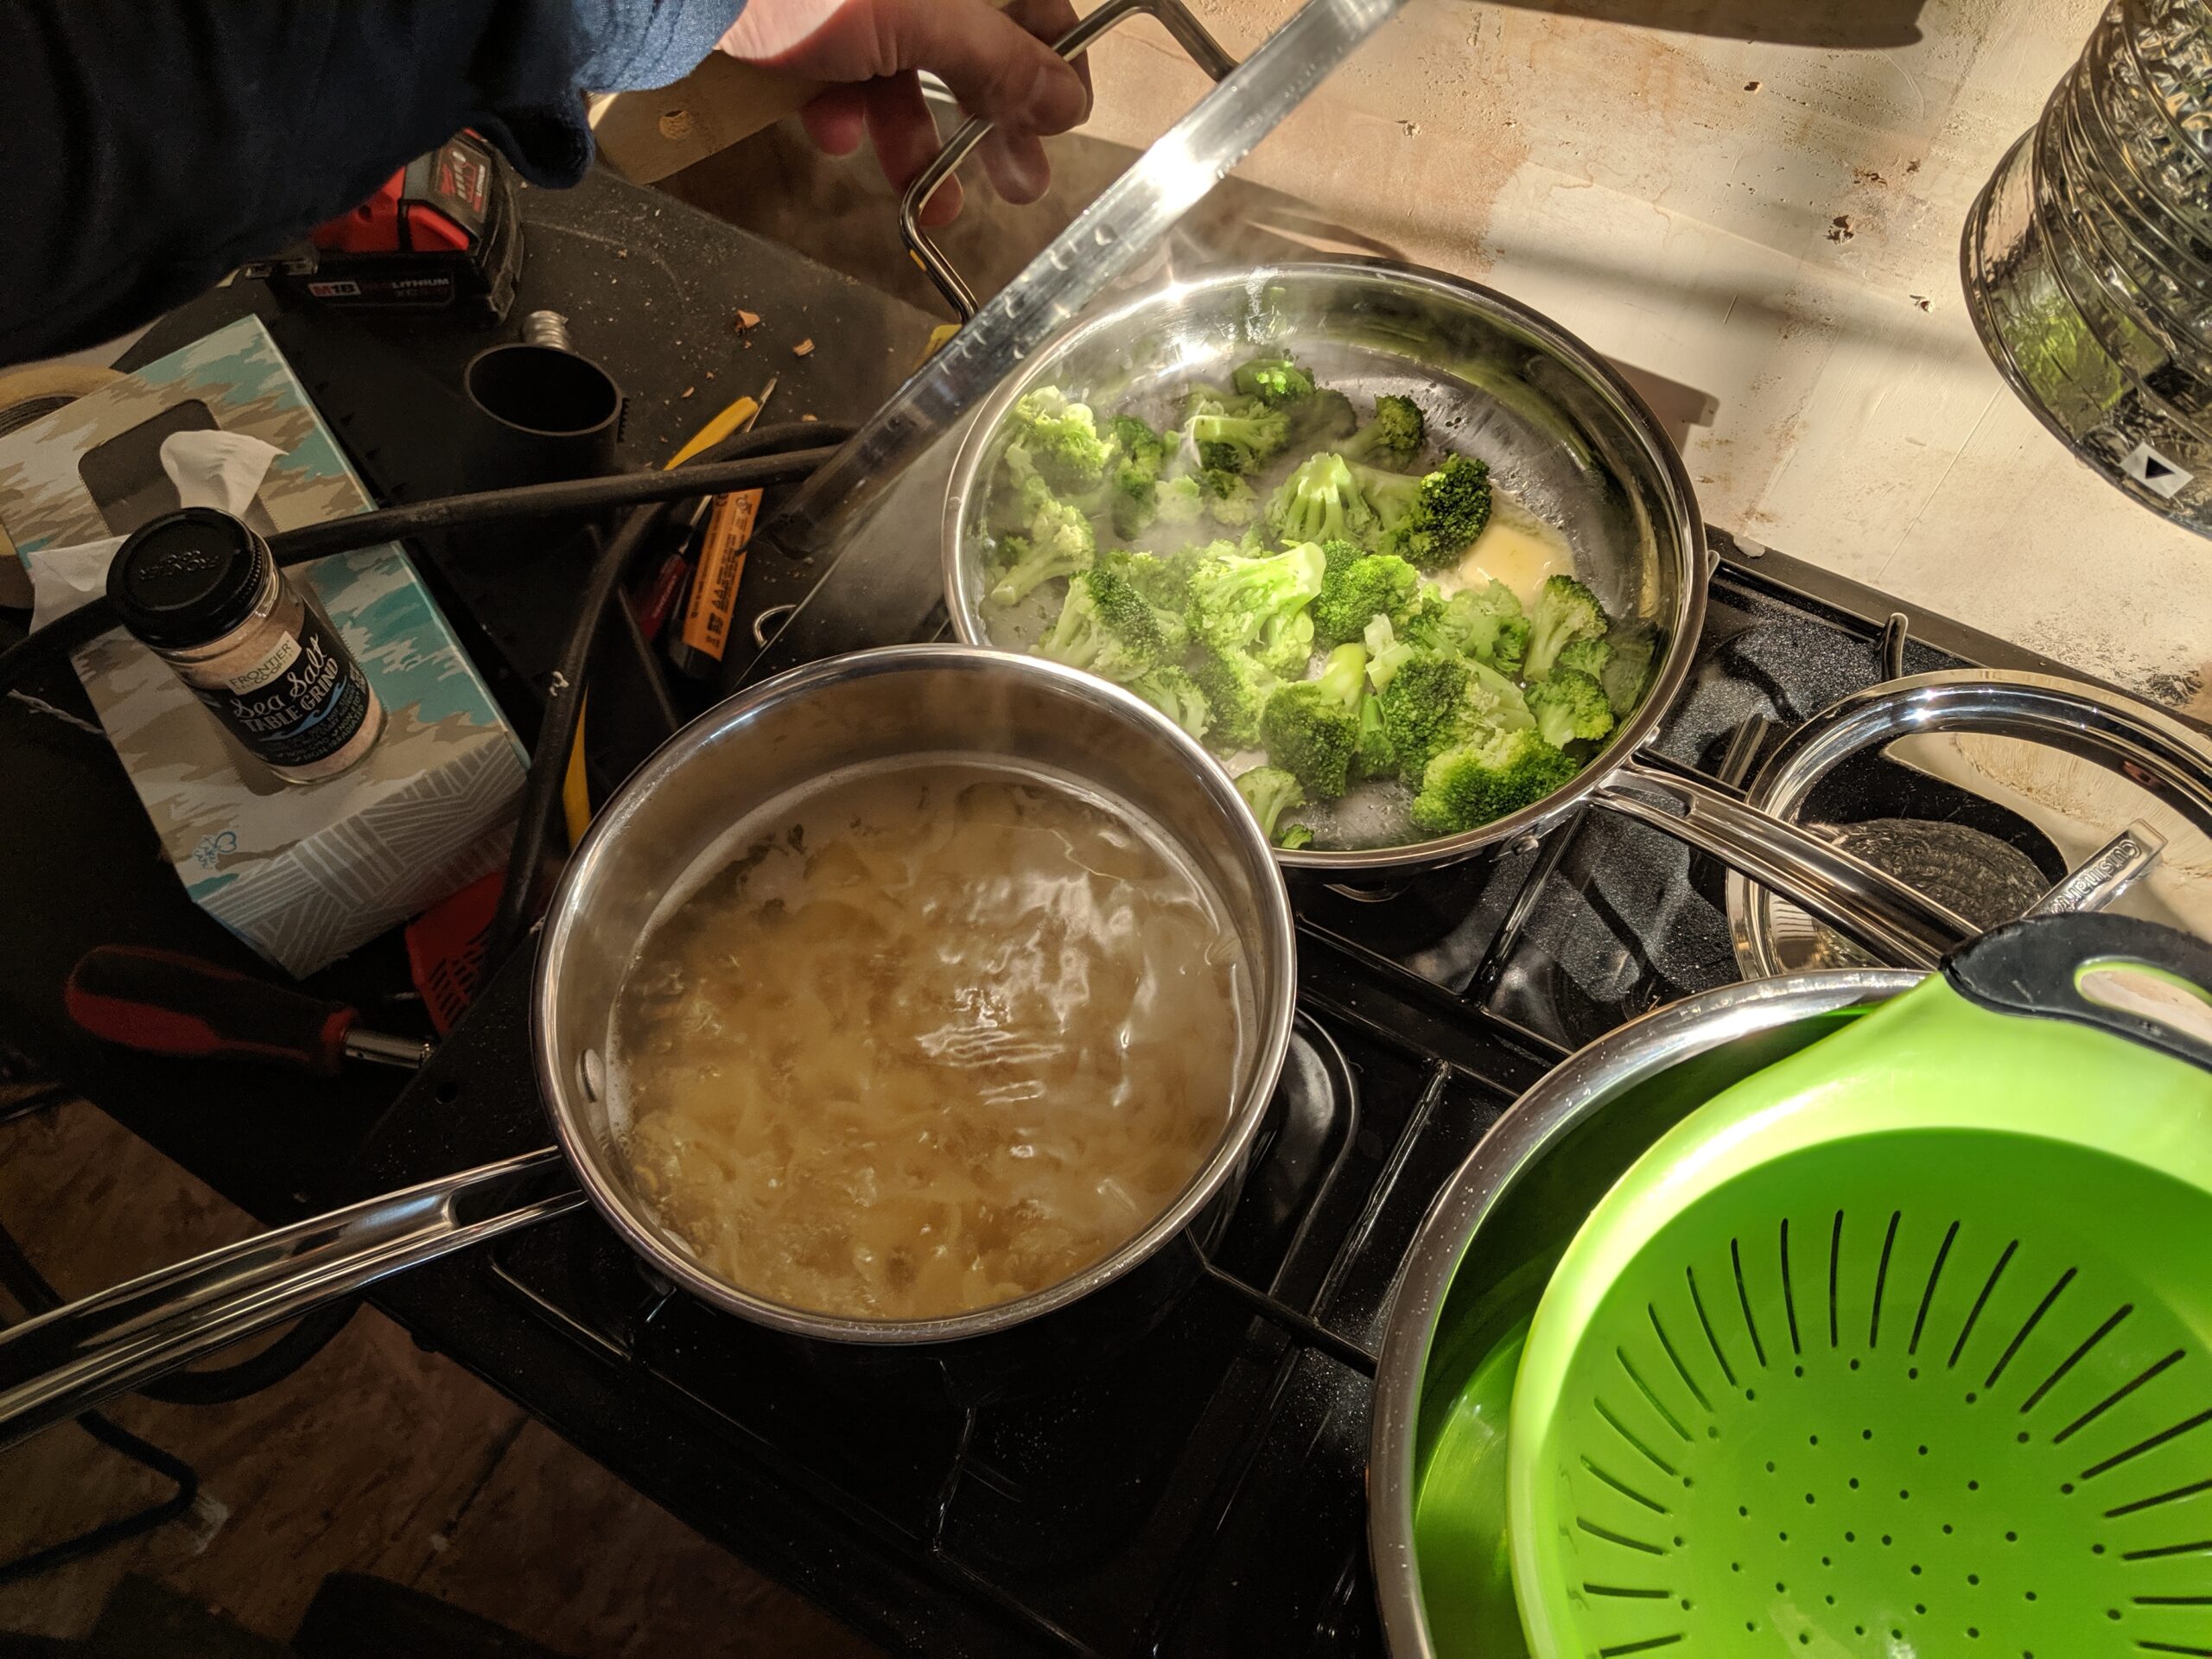
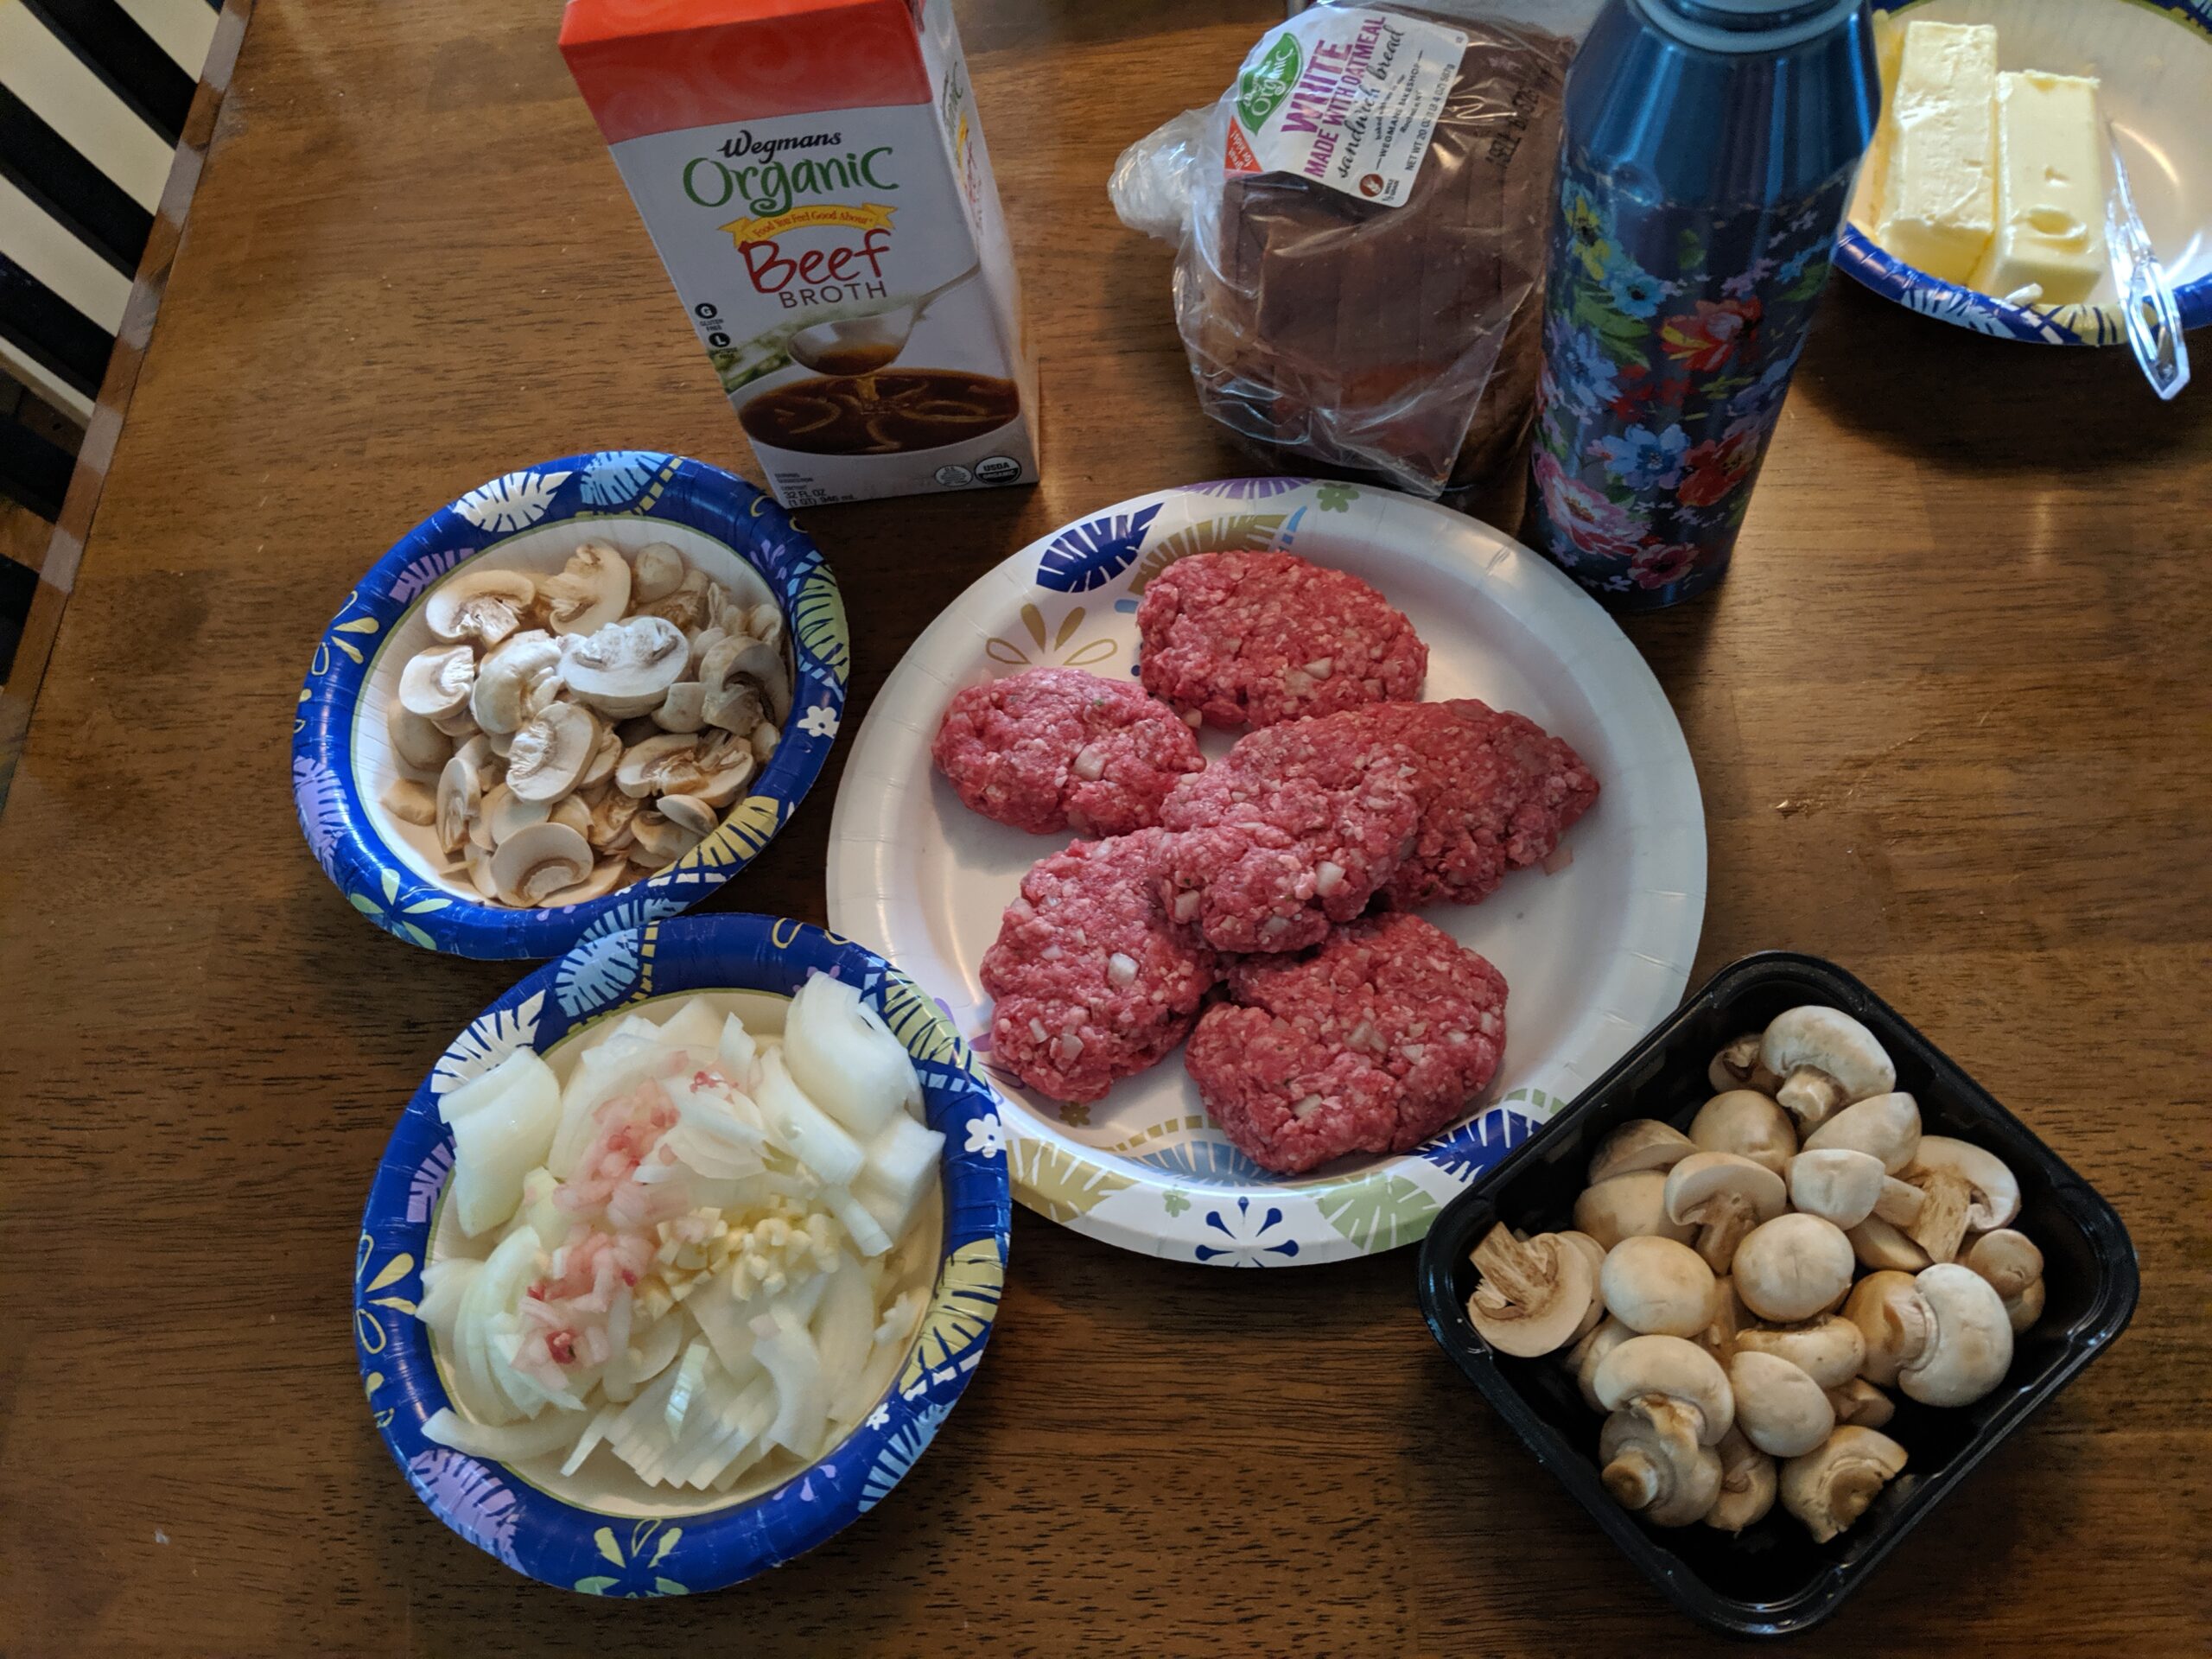
Supper Example:
- Boiled pasta in salt water
- Sauteed bag of organic frozen broccoli with butter
- Grass fed salisbury steaks in the instant pot, with washed, sliced mushrooms and onions, organic beef broth and thickening agent (organic: white spelt flour, einkorn flour or cornstarch)
Pretty easy (especially when you use gloves to form the patties & cut onions/mushrooms!) and as you can see – able to be accomplished among the mess/dust of kitchen renovations.
This kind of meal is what we used the half broken dishwasher for. We put the pots and pans in there to clean and ate with paper and plastic.
#4 Use paper and plastic (and don’t feel bad about it)
If there’s EVER a time to use paper plates and plastic utensils, it’s NOW. Keep a garbage can close and supper should be cleaned up in a few minutes.
If you don’t have any access to a sink, like I didn’t for a month, use disposable storage containers or baggies for leftovers.
Normally I always store food in glass, but in this case, it’s worth it not having a pile of glass containers sitting around needing washed or stored somewhere. (However, always use glass if you’re going to microwave or heat something in the toaster oven).
#5 Use fold-able furniture
If you’ll notice in the pictures above, we used folding tables and chairs for some of the kitchen setup and for our “dining table” and chairs.
Just like paper and plastic saves you time, having furniture that can quickly and easily get out of the way helps you focus your time on the reno, rather than just living in the reno.
#6 Take lots of pictures
This is so important. When you’re LIVING in a reno, SEEING the progress is much harder. You’re living it, moment by moment. It’s hard to see the small steps and even when the big things happen, like building cabinets, that process can feel like forever too and you easily forget just how far you’ve come.
Take pictures and look back on them often. Surviving without a kitchen won’t feel as long and drawn out when you intentionally acknowledge the progress.
It’s to remind you where you were, where you are now, and how much closer you’re getting to the end result.
Progress during our kitchen renovation
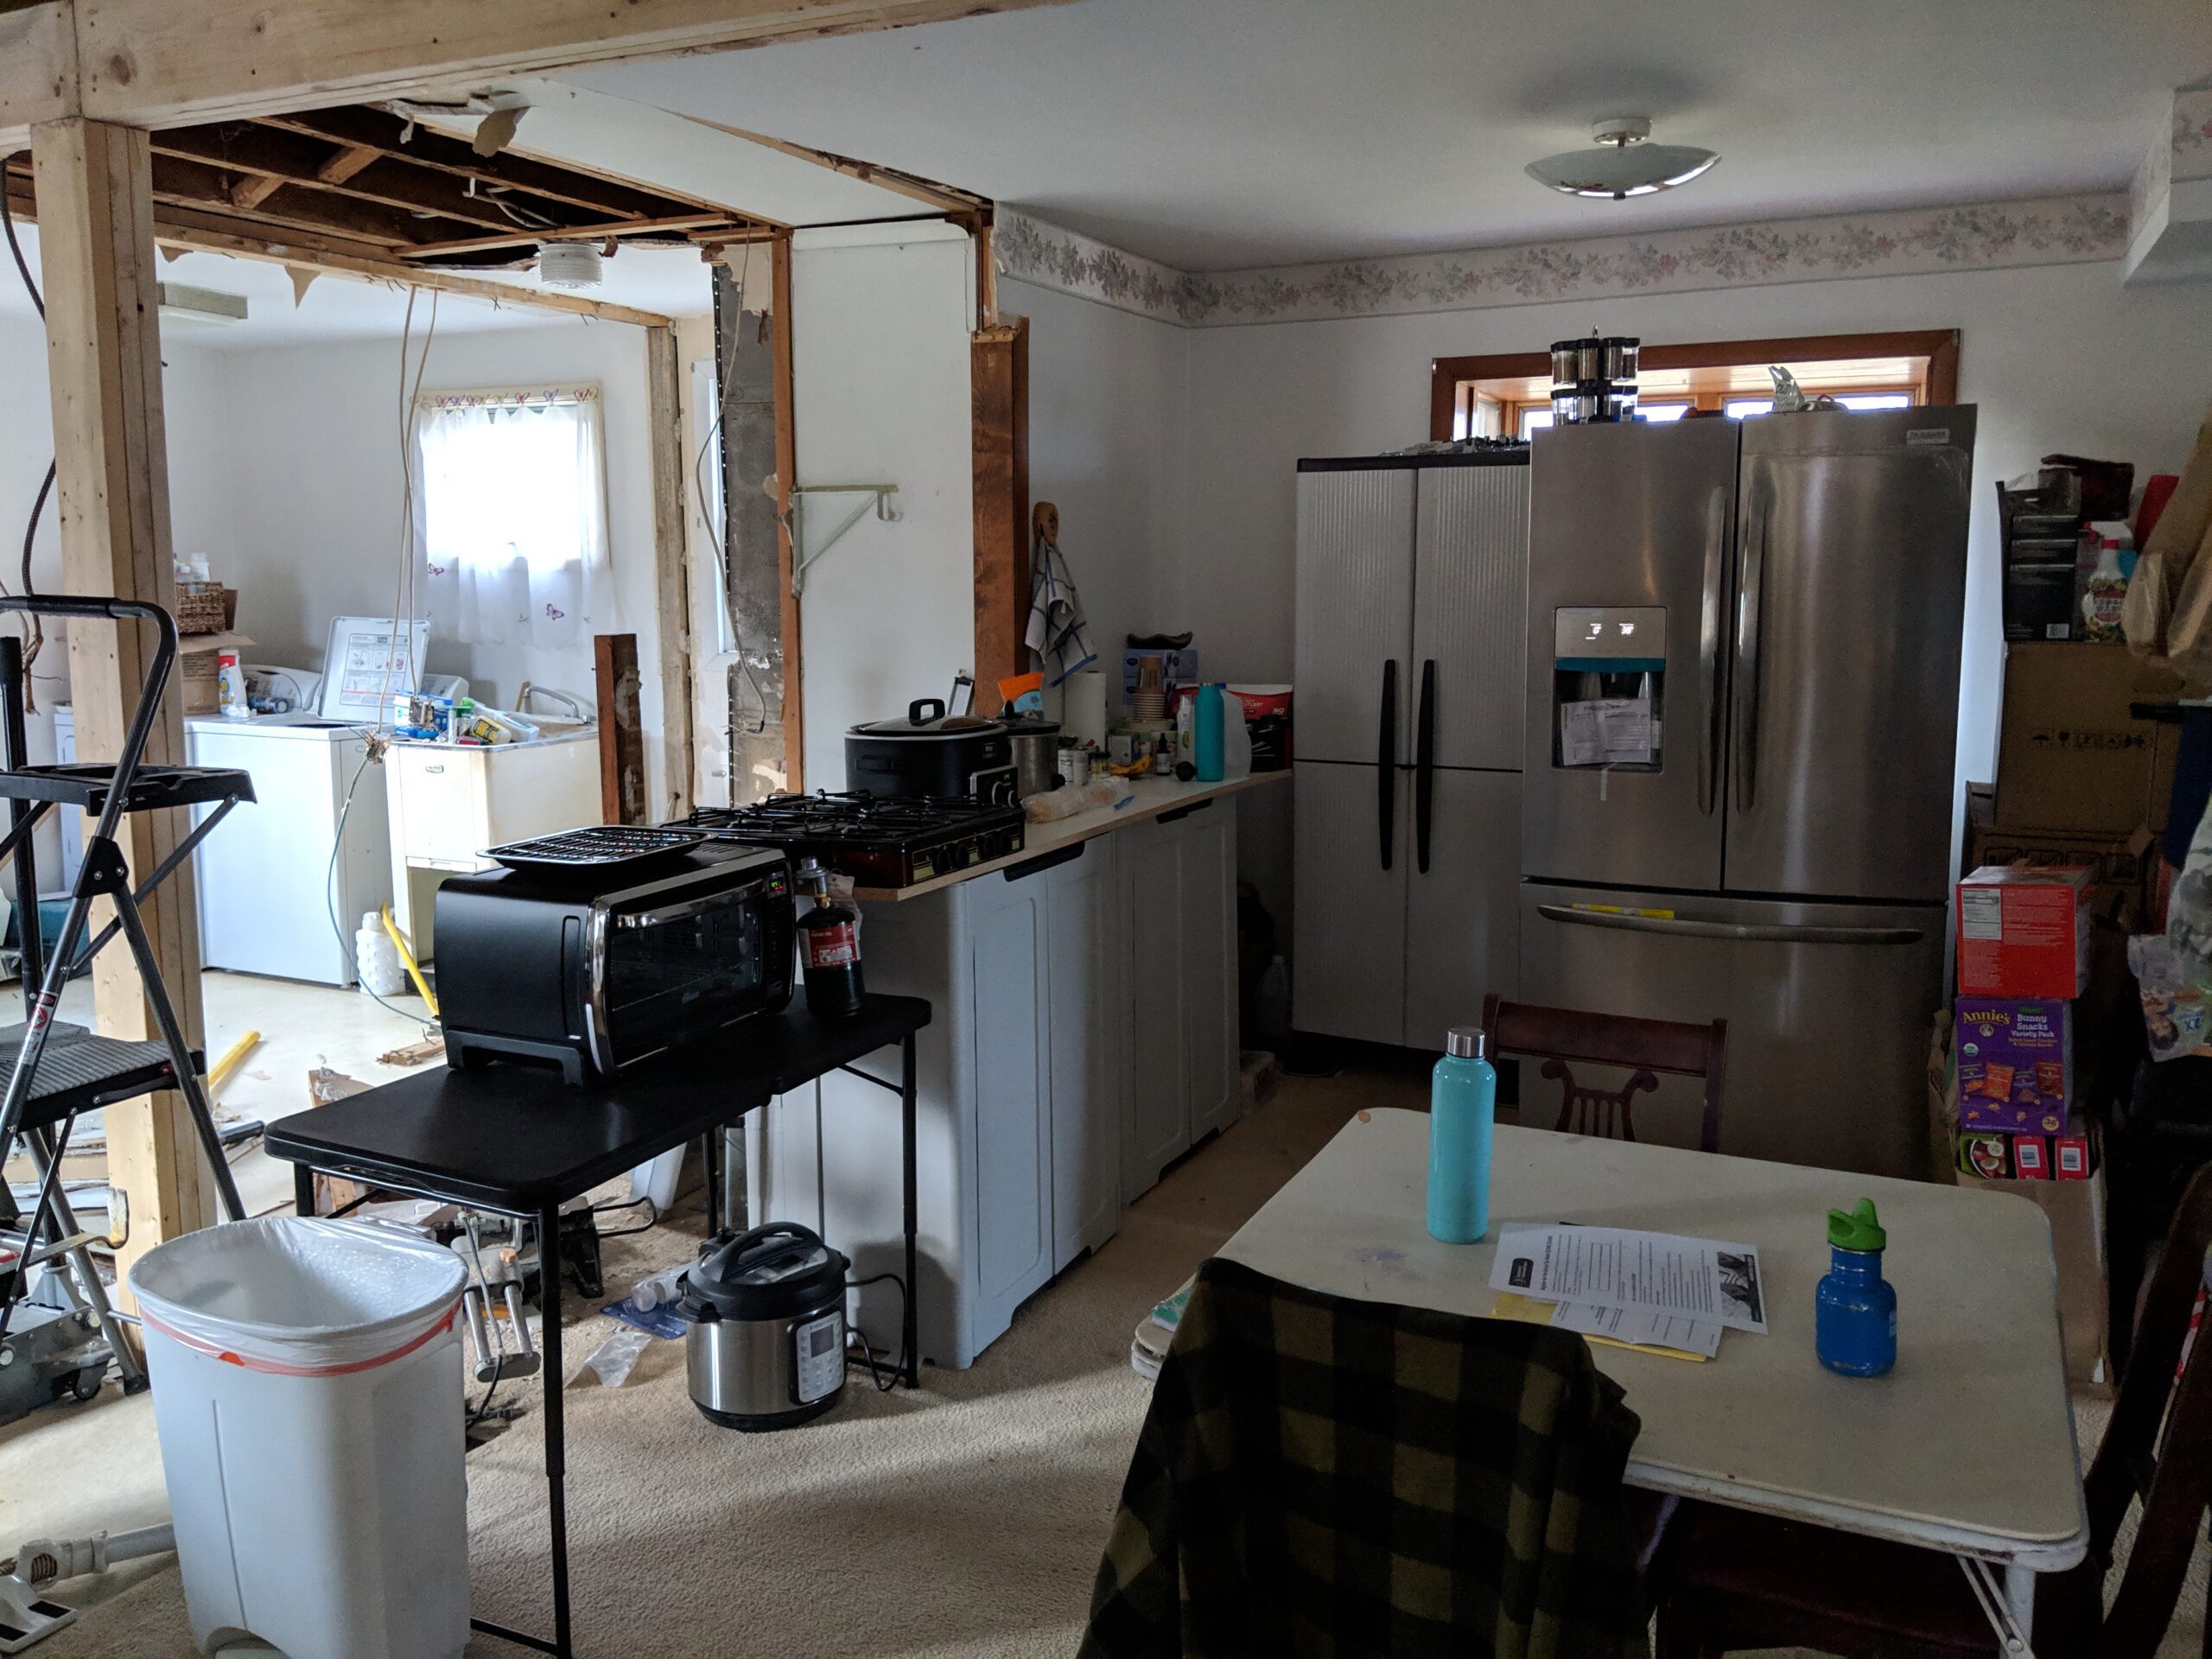
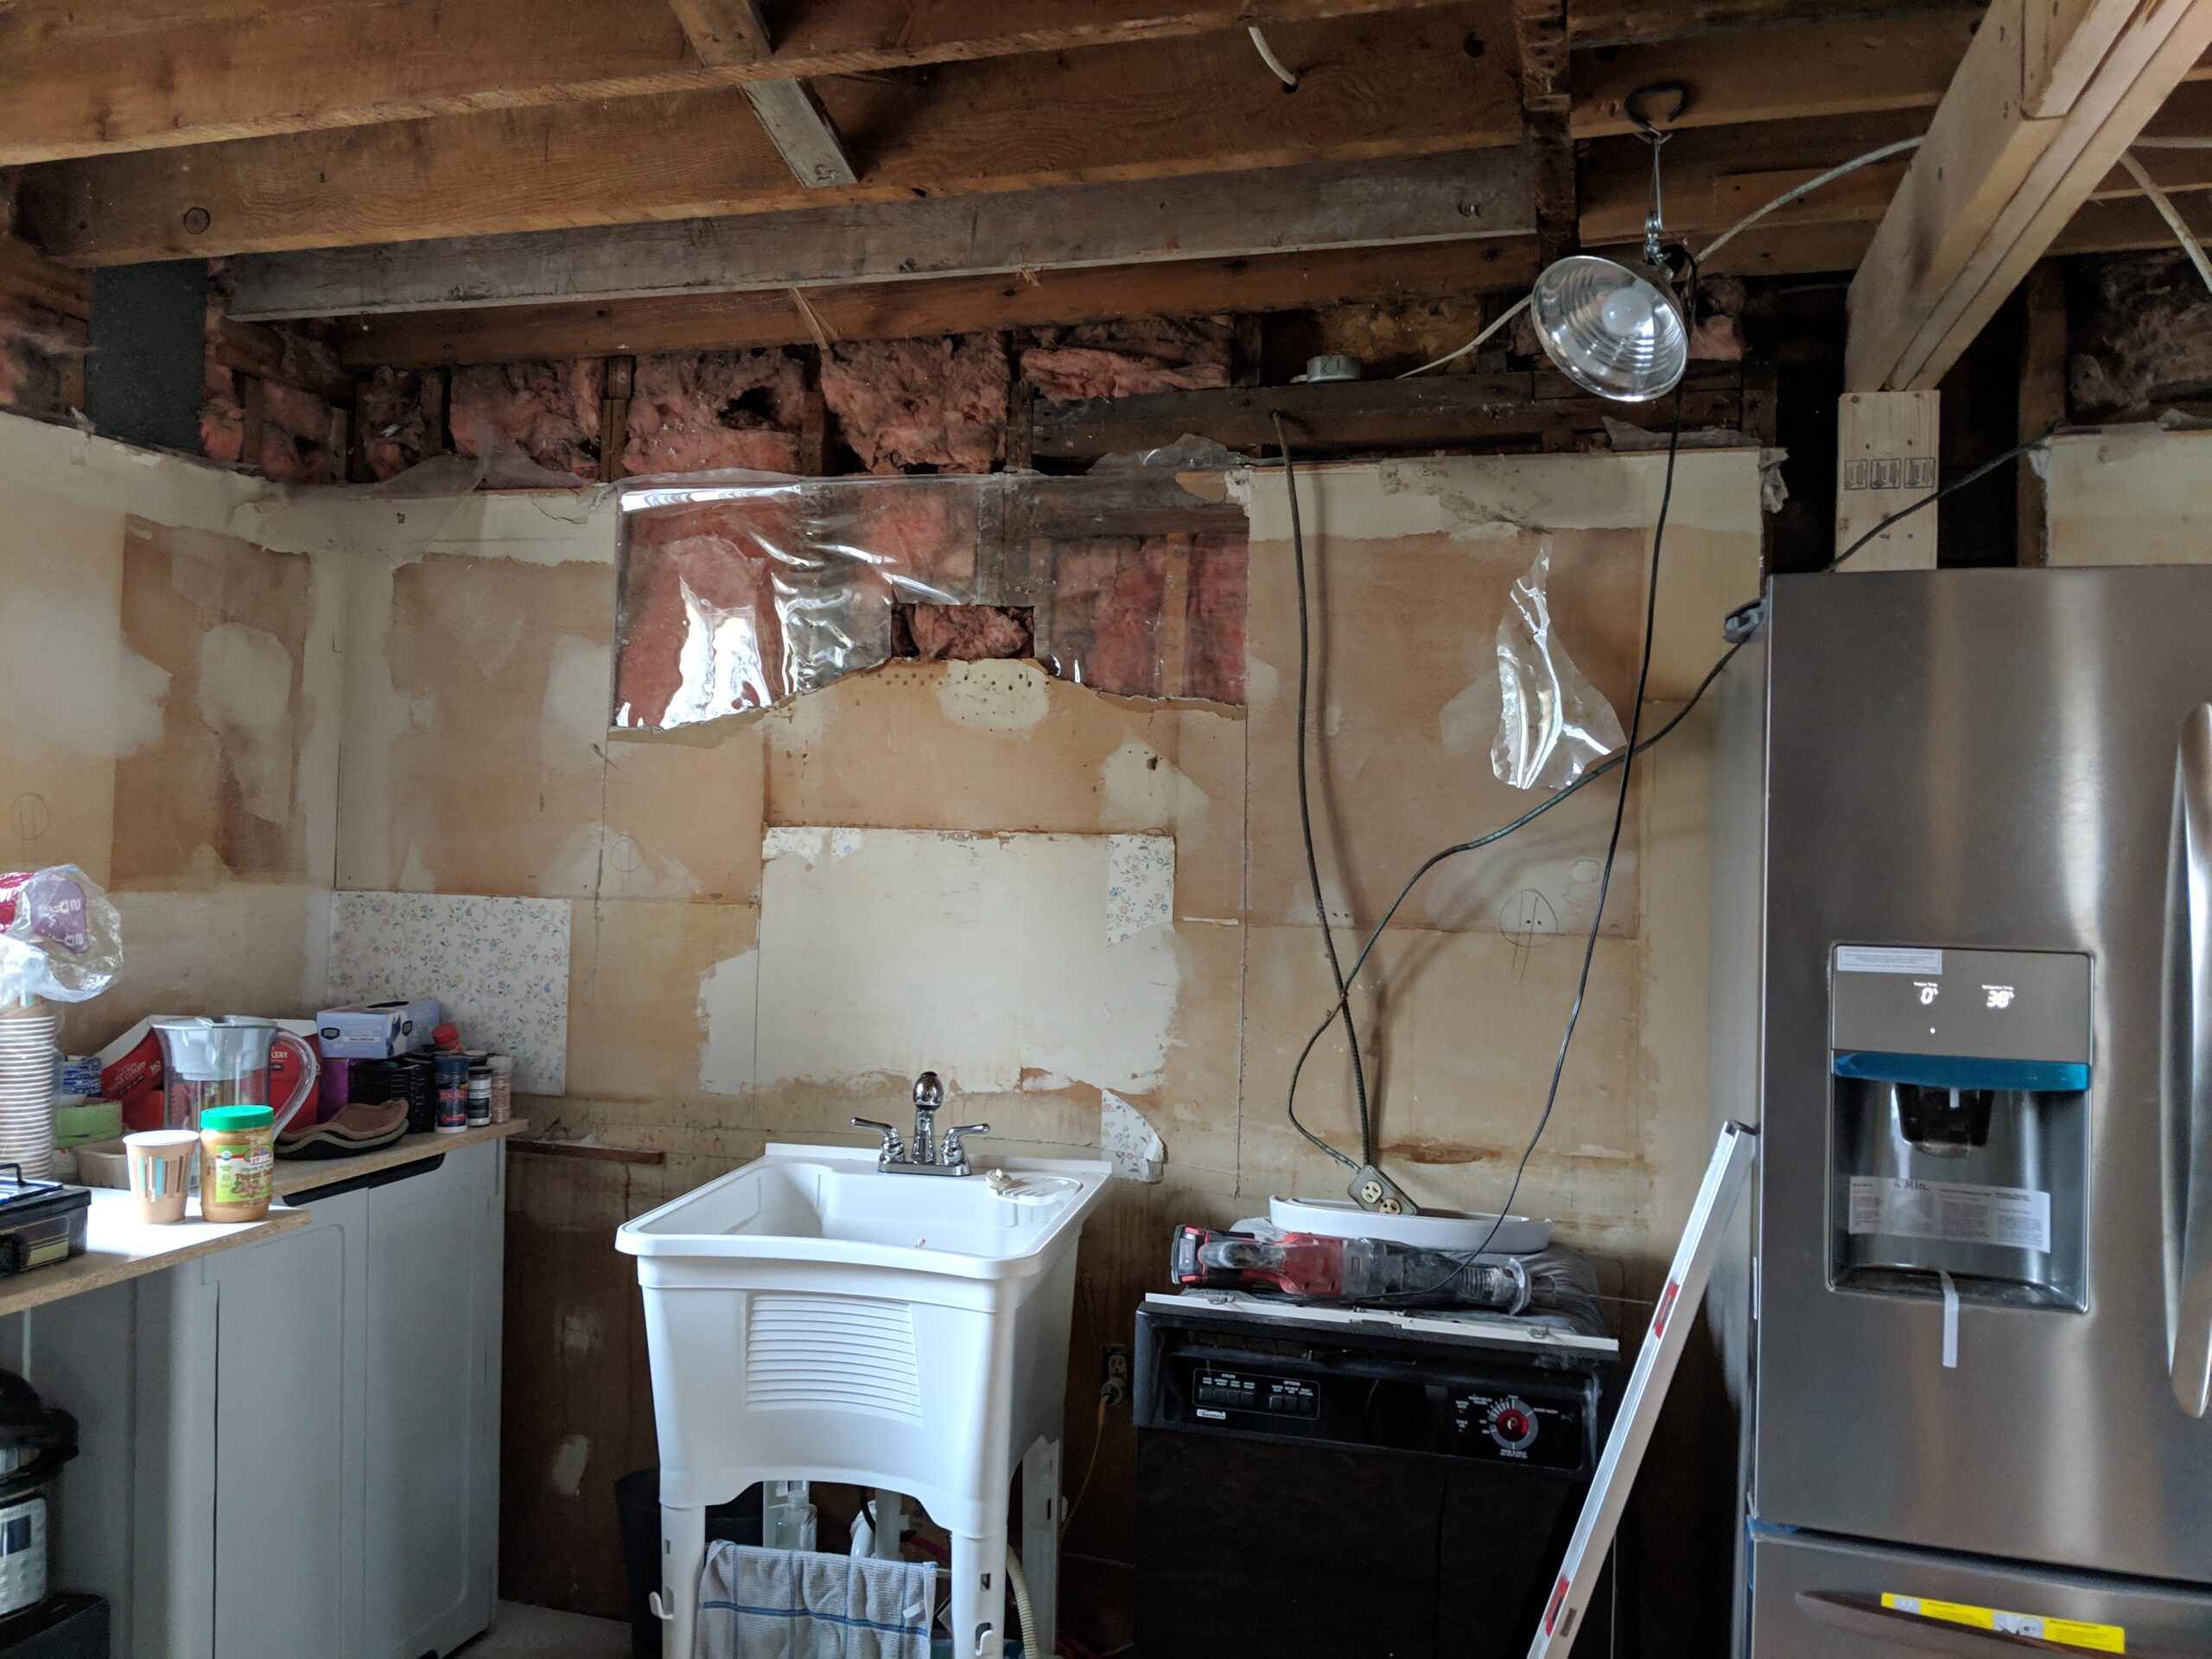
We moved the temporary kitchen at least FOUR times, during the process of renovating the entire area. We did the kitchen, dining, bathroom, back entrance/laundry area, and foyer at the same time because it all was all interconnected, so everything had to be moveable.
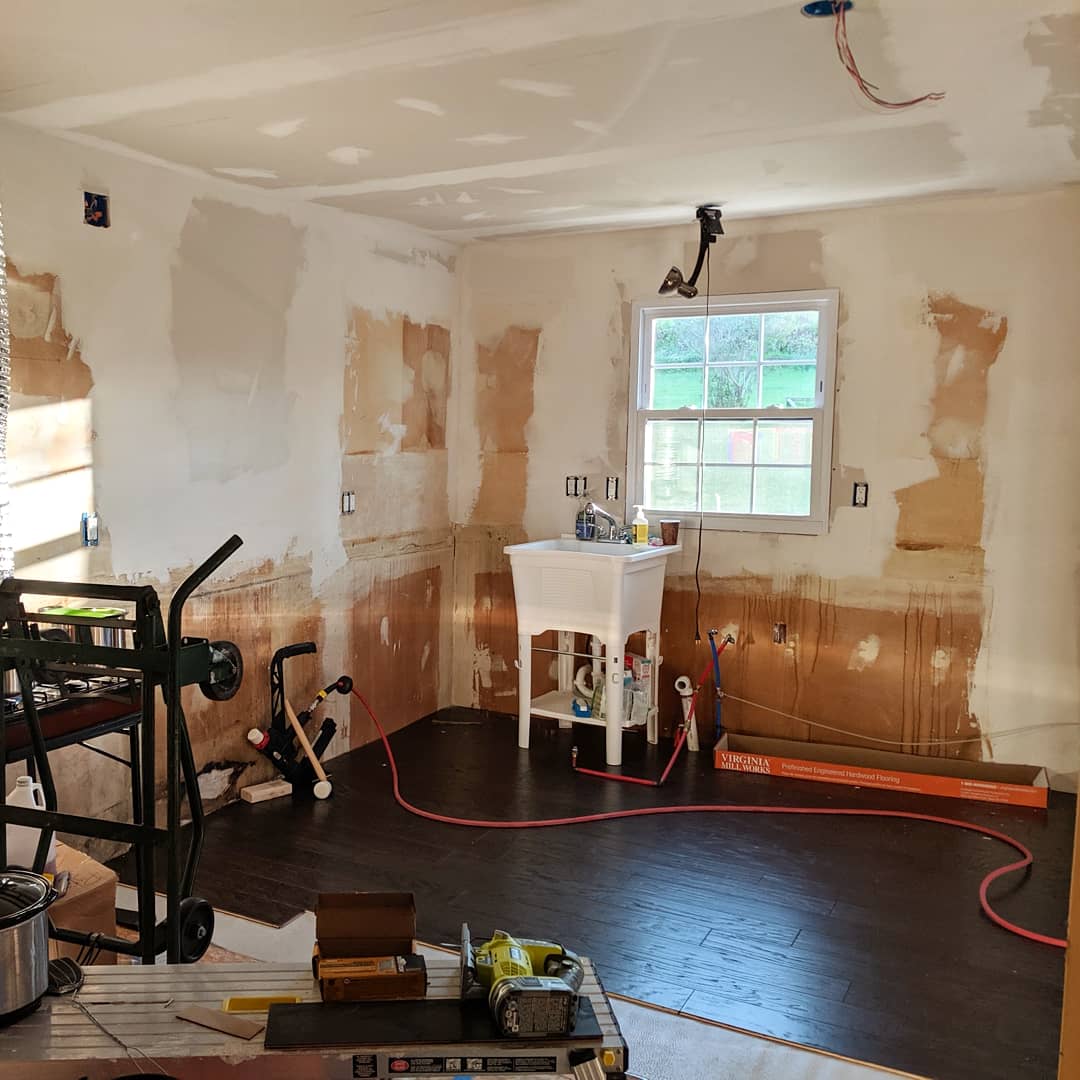
These also show the old casement window we took out so we could put double ovens in that area. That window, along with all of the upstairs windows and most of the downstairs, was old and rotted with black mold in the frame. Wasps built an active nest in the wall under it in early spring, right before it was removed, by getting through the rotted wood.
Another pro kitchen renovation tip:
Laundry tubs work amazingly well for a stand-in kitchen sink. You can do everything you normally would in a kitchen sink (pretend it’s a farmhouse sink, ha) and extra – like washing out drywalling/mudding tools, paint brushes, rollers, etc. They’re also pretty cheap and can be reused later in a basement or garage.
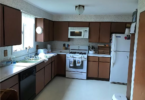
This is the last set up before we started building the actual kitchen!
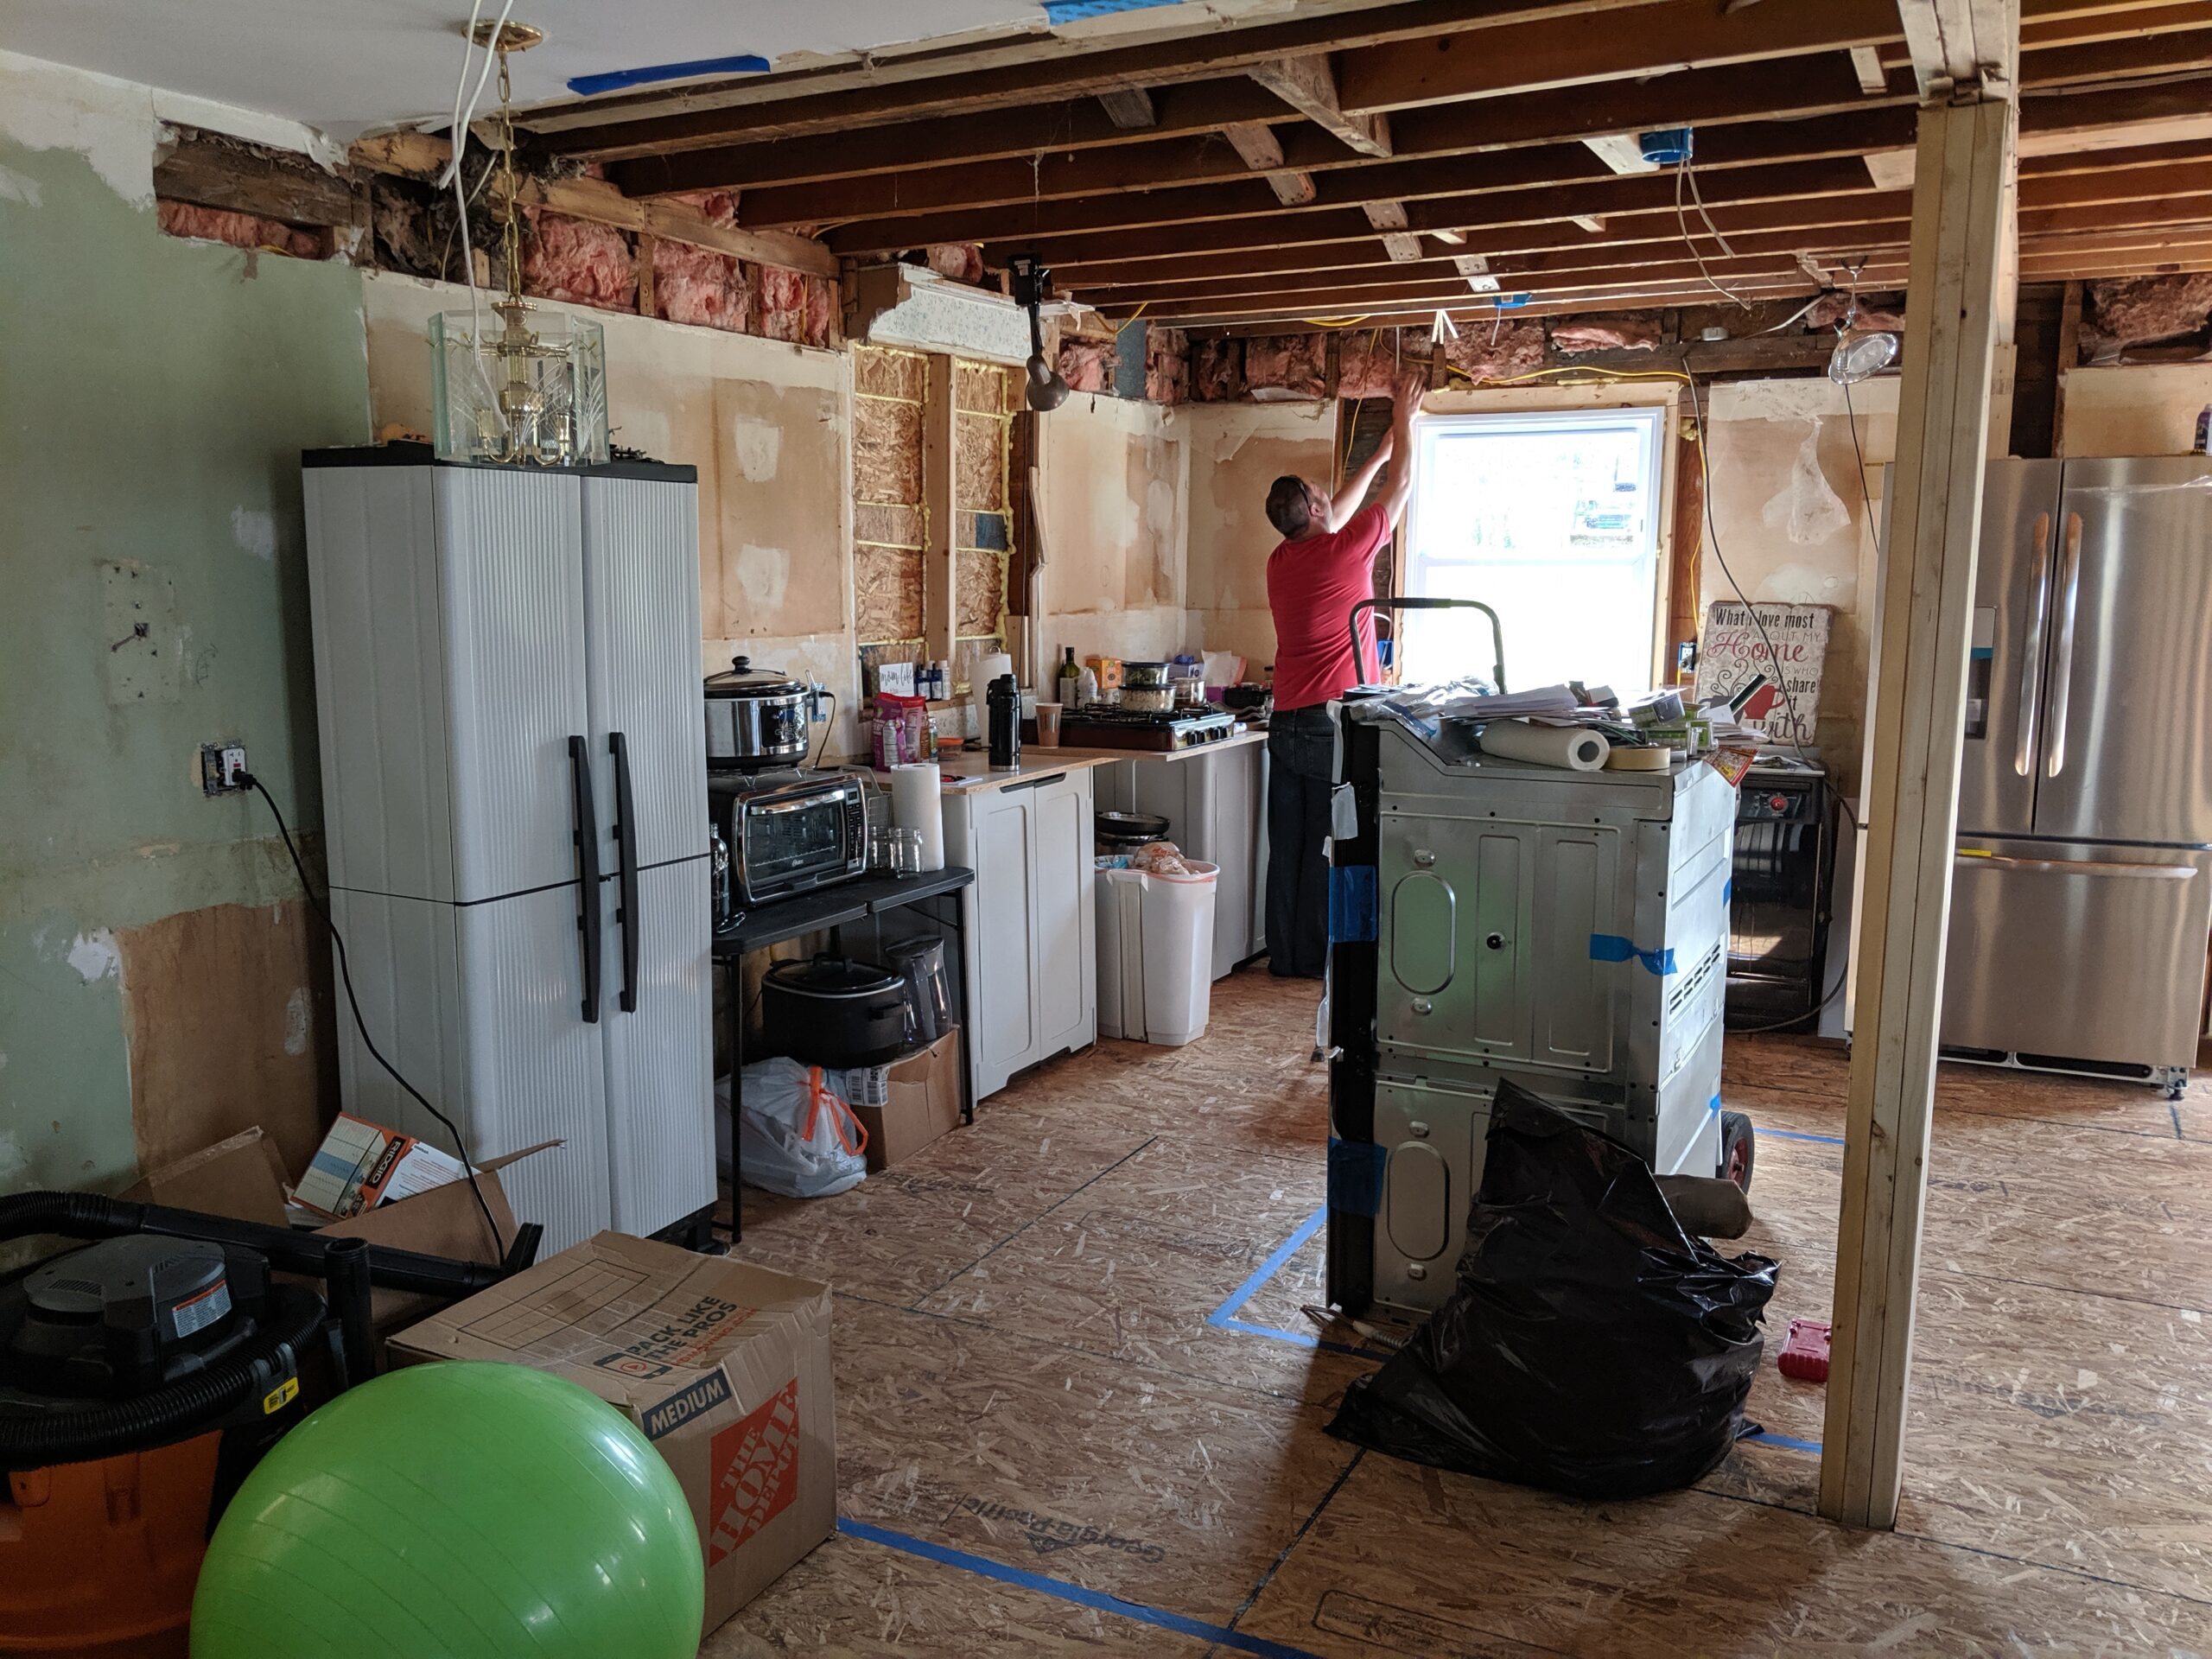
We had to do:
- new wiring
- plumbing
- subfloor
- move the window (see above – the new window and where the old one used to be)
- move the back door
- open up the bathroom/laundry area
- redesign the floorplan, plumbing and walls there
- drywall the ceiling
- drywall/patch the walls
And we had to do all of that before we could start building cabinets. These are the non-glamorous, unavoidable parts of renovation.

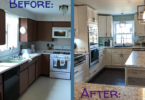
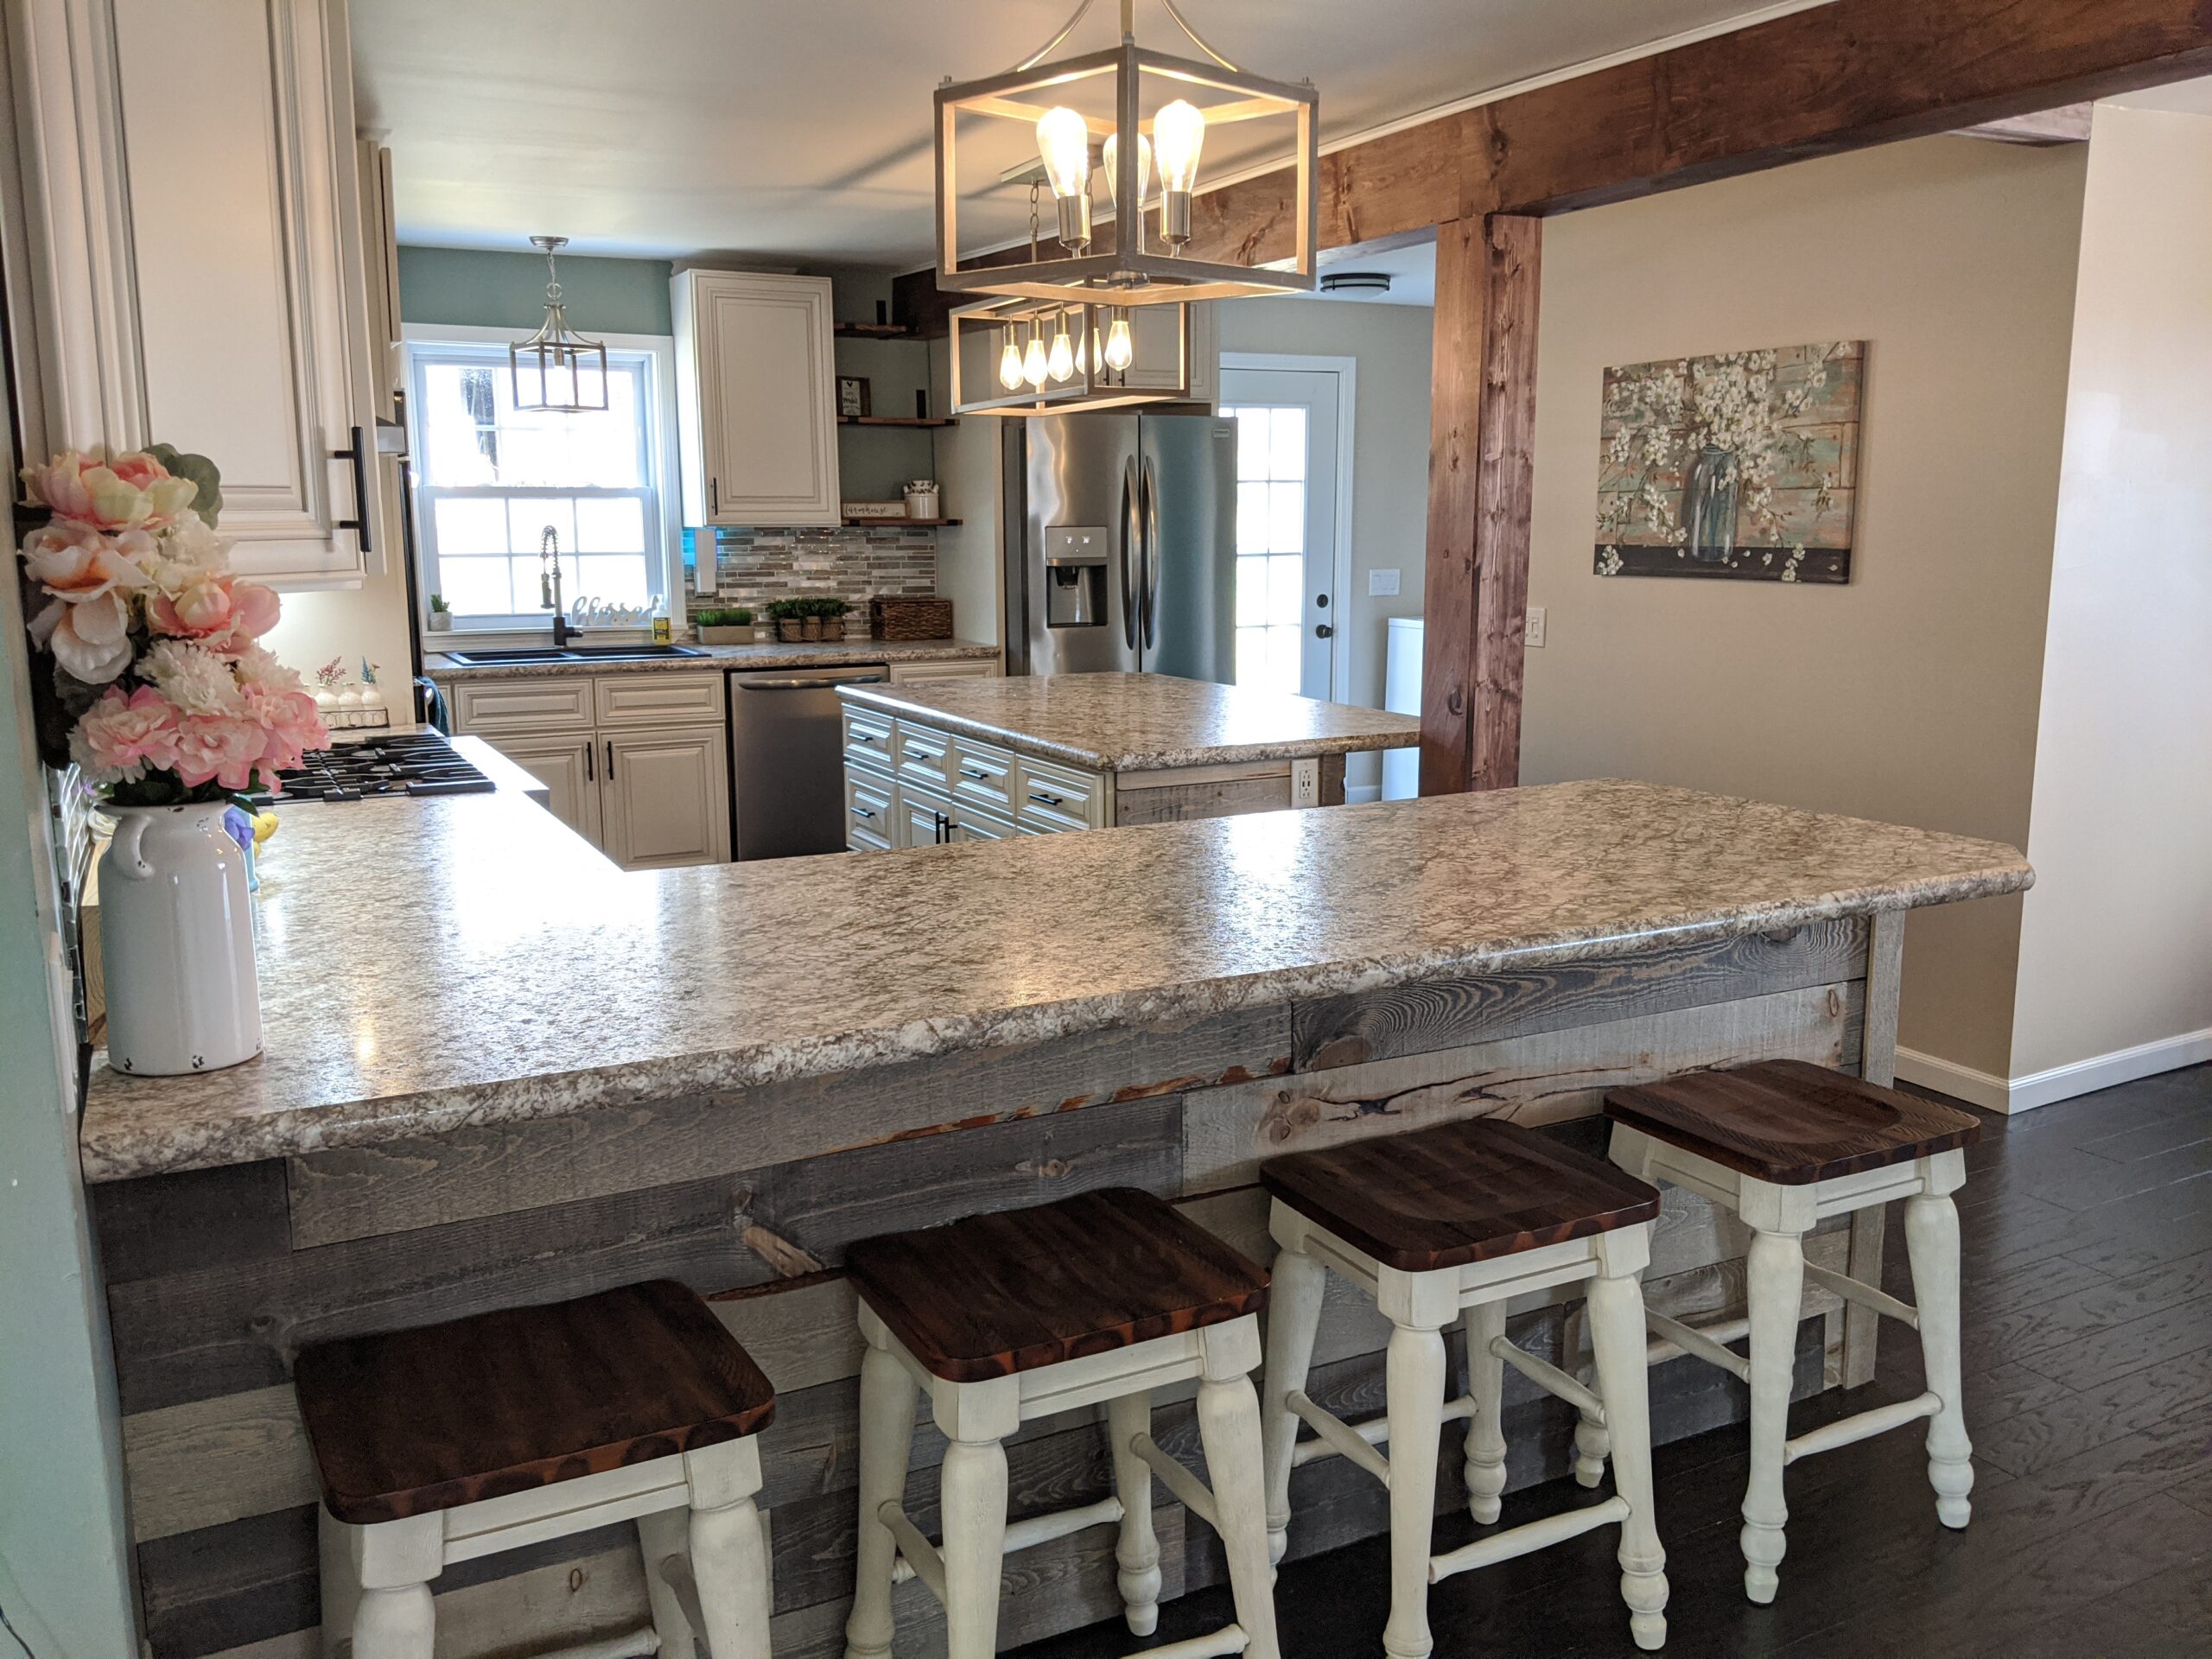
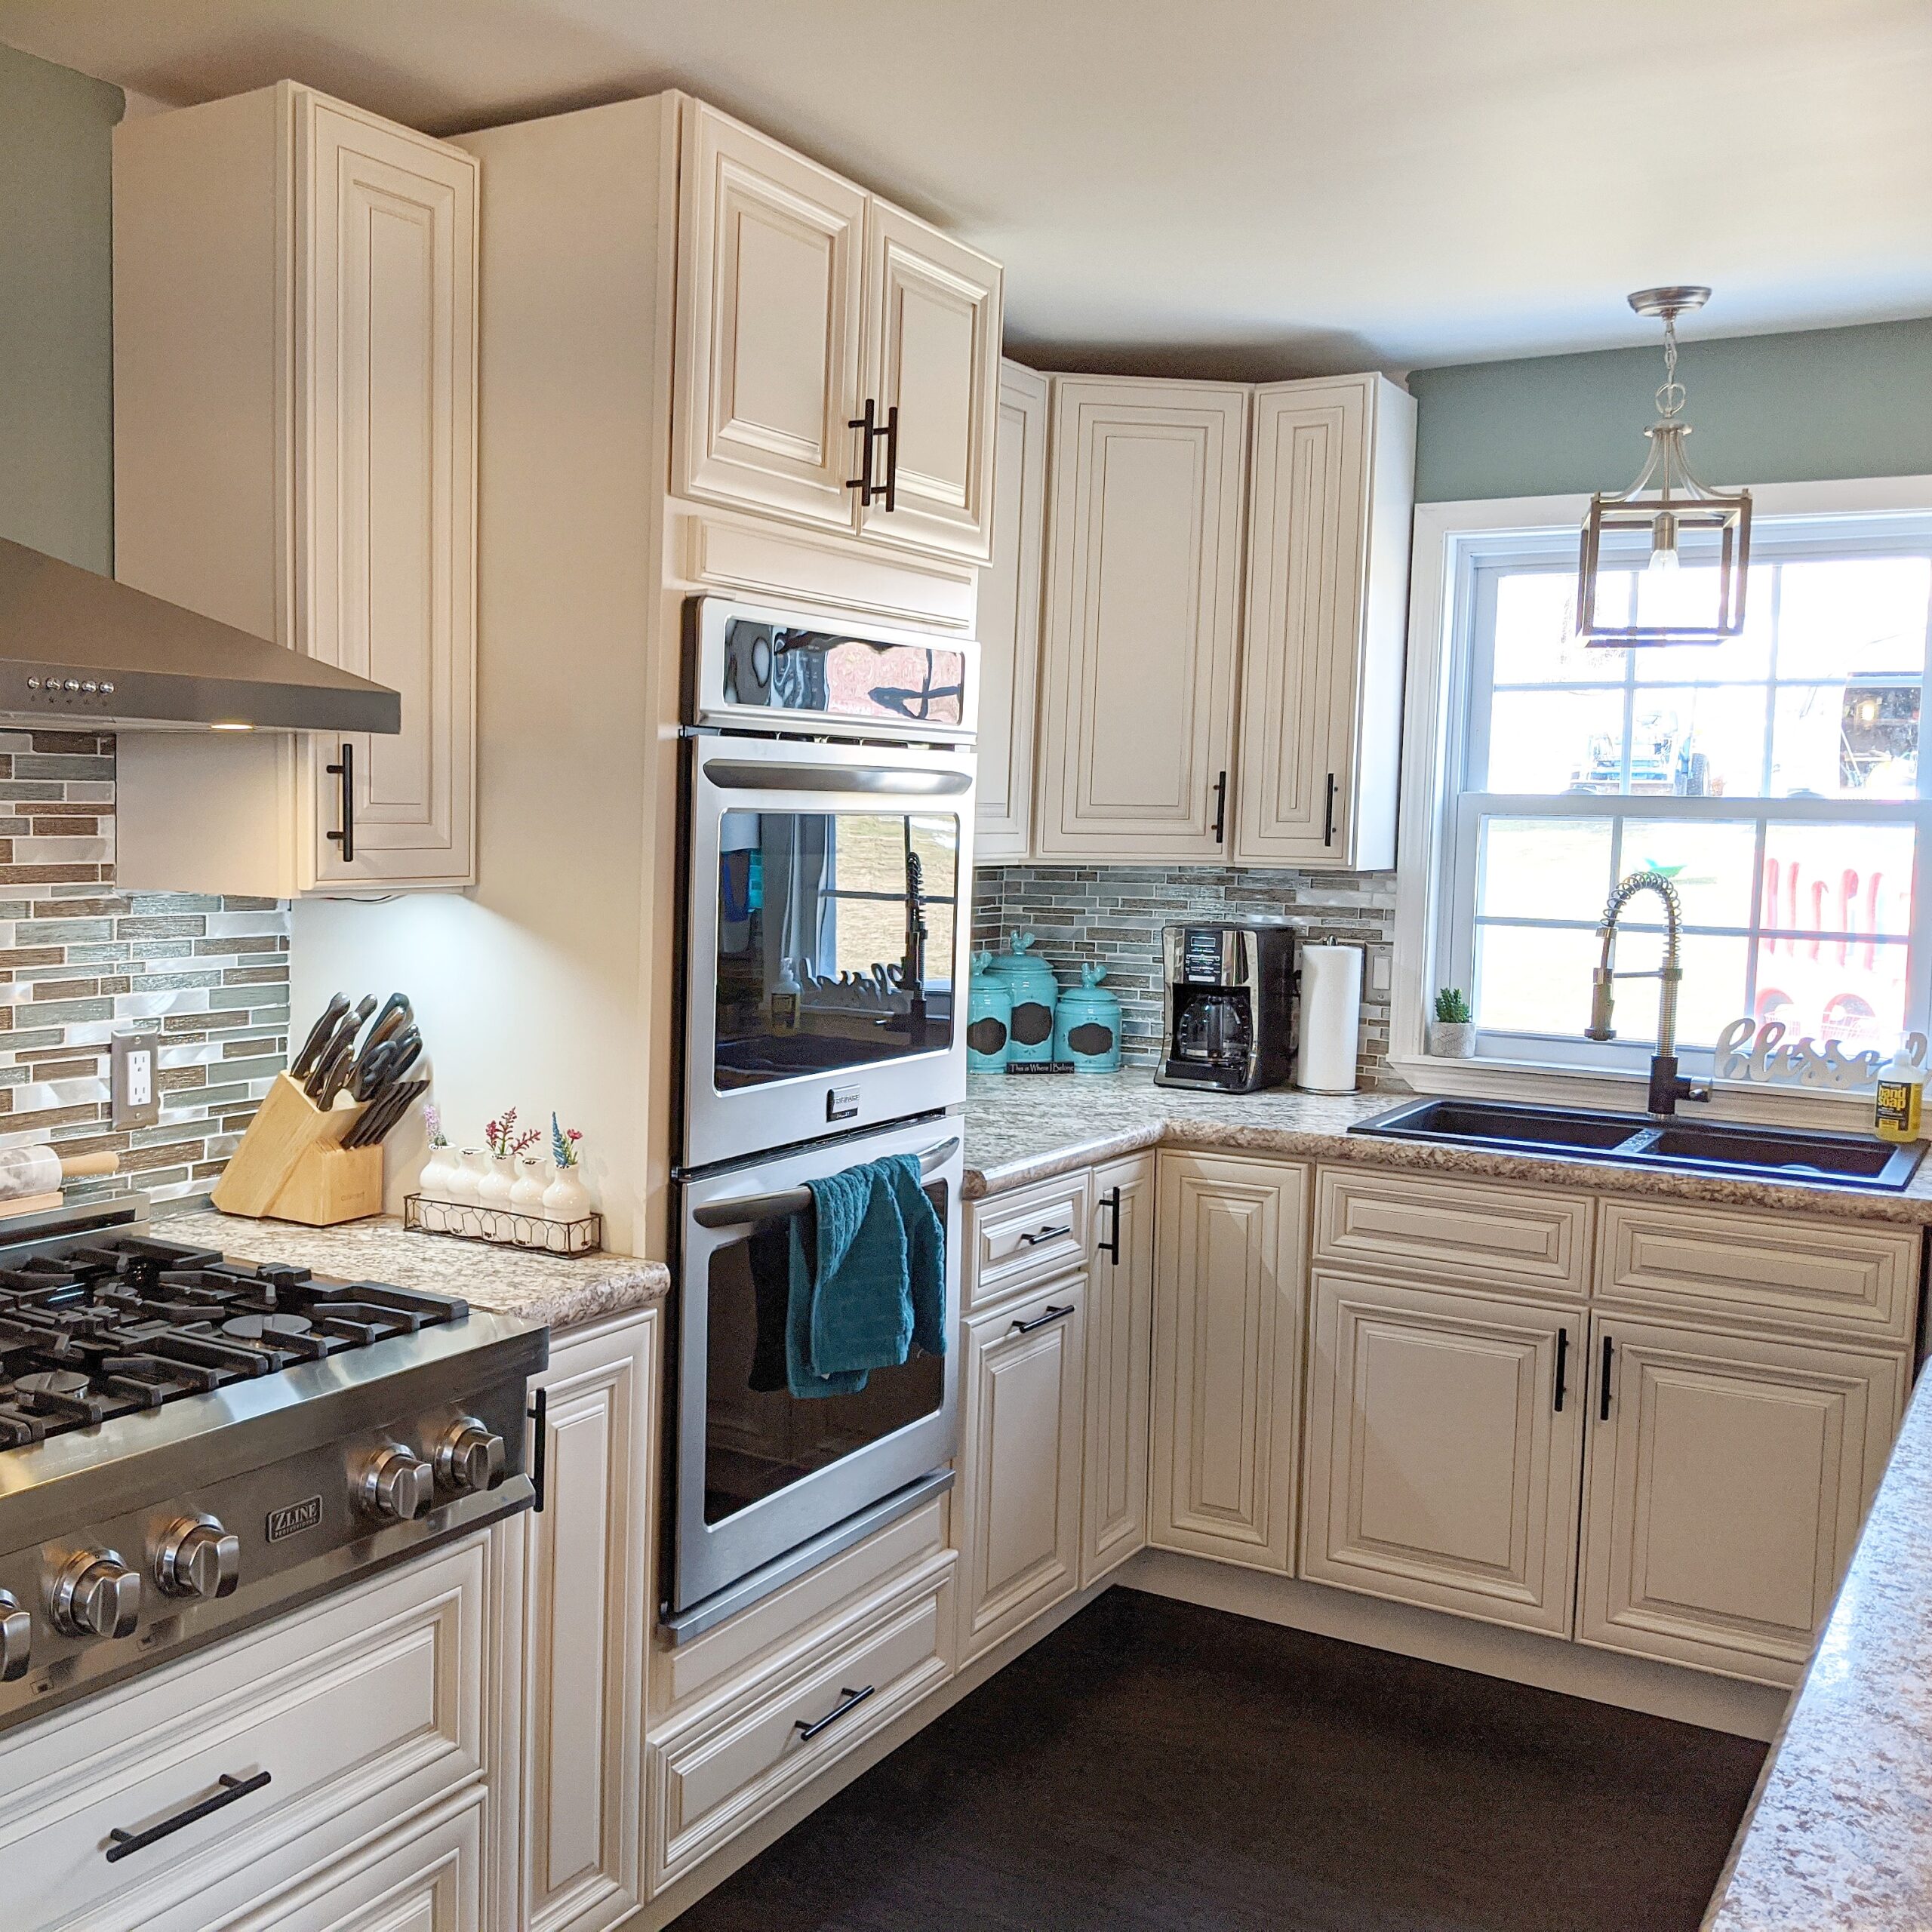
Then, finally, the entire area got all new flooring, appliances, fixtures and cabinetry.
So, last but certainly not least, all that surviving without a kitchen paid off and we have THIS out of it.
What made surviving without a kitchen worth it:

In Conclusion
A kitchen renovation might be one of the hardest things you do, and even though surviving without a kitchen can feel like a limb was cut off, in the end it’s probably one of the most worthwhile things you could do to your house.
Don’t give up, keep pressing on.
Want to see more of this massive kitchen remodel?
- DIY renovation of this boring 1960’s kitchen: Demo Day!
- How we updated this old kitchen: the before and after
Have you done a kitchen remodel where you had to live without a kitchen for a while? If so, share in the comments what you did to get through it!